Elf File - Gift Card Holder

Today I have a final gift card holder that I'd like to share with you.  It's actually a card, but it's doubling as a gift card holder since I added glue dots to the gift card, stuck it on the inside of the card and then stamped my sentiments around it.
 
I made this for my dad - the man who has everything.  Every year I ask my mom what I should get for my dad and every year it's the same thing.  Just get him a gift card to Bass Pro because he's always finding something new he wants for his fishing.  And so that's what I do.  I get him a gift card.....
 
Rather than just giving him the gift card in an envelope though I wanted to make a card or something for it to go in.  So I thought it would be cute to use all the different elf stamps I had and set to work creating this themed card.  I used the Buddy the Elf file from the recent Christmas movie blog hop sponsored by SVG Cutting Files and the file folder from the Cricut cartridge Graphically Speaking. 
 
All of the different stamped sentiments you see on my file folder, pages and inside of the card are from the Jaded Blossom stamp sets Elf Workshop and Elf Report Card.  Sadly though I do not have any markers or colored pencils with which to color in my elf, but that's okay I think it's fine the way that it is.

Now of course I'm entering this card in to a challenge or two.  Want to come play along as well?  I'm entering this card into the following challenges:

Anything Christmas - SVG Cutting Files - Ends January 14th

Elf (Holiday Inspired Project) - Red Carpet Studios - Ends December 31st

December Linky Party - DL Art - Ends December 31st

Anything Christmas - Bitten by the Bug 2 - Ends December 28th
 

Spartan Elf Games

We heard quite the ruckus coming from the living room last night and wondered what all the commotion was about.  You wouldn't believe what we found we got in there......
 
Yep, true to form, our house divided elves decided to have a friendly little Spartan race competition of their own.  Those silly elves.  I can't imagine where they got such an idea.  :)

And now it's off to the linky races for this post.  I discovered that Diana is hosting her 2nd annual Elf Antics linky party so we're heading there to play along.  If you have an elf why don't you come join the fun at DL Art.

Playful Penguin Gift Card Holder

With all the rain and cold weather that moved in yesterday we just might end up having a cold Christmas this year.  Of course the good thing about that is that I've been sitting in my craft room in my jammies, drinking coffee with the space heater going while I get the last of my gifts made.
 
Right now I want to share a gift card holder that I finished this morning.  For this project I cut the mug from the Cricut cartridge Everyday Pop Up Cards and George.  I welded two of the mug shapes together and then used George to create the slit for the gift card tag to slide into. 
 
To create my tag/card holder, I embossed the tag using one of my Christmas folders and then inked over it with some Tim Holtz Distress Ink in Broken China.  To hold the gift card in place I simple adhered glue dots to the back and stuck it on the tag.
 
The penguin is from the Playful Little Penguins file at Too Cute by Jessica.  The stamped sentiment on the mug and the snowman on the tag are from the Simply Christmas set by Craftin Desert Divas.
 
And now I am going to enter this project in to the following challenges:
 
Christmas - Craftin Desert Divas - Ends December 21st
 
December Linky Challenge - DL Art - Ends December 31st
 
Anything Goes - Fantabulous Cricut Challenge - Ends December 21st


You're a Mean One.....


I have to admit it.  Other than Rudolph and the Miser Brothers the Grinch is my all-time favorite Christmas character.  So as I had some free time I decided to create a Christmas shadowbox that was inspired by this T-Shirt I saw when I was at Universal Studios last month. 
 
 
And it all comes just in time for some great challenges that end this week as well.  (But more about those later.)  First let me tell you how I created my shadowbox.  I started with an 11 x 14 frame that I picked up from Michaels.  Then using Excel I created the line-up back drop on an 8 1/2 x 11 sheet of white cardstock.
 
The Grinch cut out is from the Krafty Nook and the Ornament in the Grinch's hand is from the Cricut cartridge Simply Charmed.
 
To create the mugshot placard I simply cut a piece of black cardstock and had my Cricut Explore write the verbiage.  The Grinch and Who-ville Police Dept. verbiage I cut out from vinyl and adhered to the outside of the glass.  The font used in both cases is called Grinched and I downloaded it from dafont.com.
 
And now I'm going to enter this shadowbox into the following challenges:
 
Christmas Carol Inspired - Die Cuttin' Divas - Ends December 21st
     not necessarily a "carol" but it is one of my favorite Christmas songs....


Christmas Ornament Challenge - Bitten by the Bug 2 - Ends December 21st
 
Anything Goes - Fantabulous Cricut Challenge - Ends December 21st
 
December Linky Challenge - DL Art - Ends December 31st

Elf,  (project inspired by the holiday season) - Red Carpet Studios - Ends December 31st

House Divided Elf Games

While traveling back from Atlanta we stopped at one of my favorite stops - Priester's Pecans.  This is usually an annual stop for us during Thanksgiving.  This year however, we spent the Thanksgiving holiday at Universal Studios instead of in Birmingham. 
 
While at Priester's looking for our annual ornament to add to our tree I found these wonderful collegiate Elves and just had to bring them home!  And now I can play some of the Elf games!  So what kind of mischief will these two get themselves in to?
 
Stick around to find out, but first it looks like they decided to bring all of their new friends out to play.....They even found Ms. Hope - our new friend who came to us from Diana over at DL Art.

Bah Humbug Holidays


I absolutely love Christmas but I just could not resist these funny sentiments and perfect files to go with them.  So since today begins the mid Holiday challenge over at Double Click Skittles I thought I'd have some fun with these guys.
 
Both of my cutting files are from blogs hops sponsored by SVG Cutting Files.  That means the files are only available during the blog hops. 
 
The stamped sentiments on my wine tag and card are both from the Jaded Blossom stamp set titled Bah Humbug.  The inside of my card also has a sentiment......
 
 
... it's from the Naughty or Nice? stamp set by My Craft Spot.  The list cut is from one of the Christmas Cricut cartridges but I don't remember which one.
 
Now that you've seen my take on this week's challenge be sure to check out the other designs our team created for you and then create your own holiday project, link up and play along with us.  And remember, you can always buy your skittles here.

And now I'm off to enter this into the  following challenges:

Anything Christmas challenge -  SVG Cutting Files. - Ends January 14

December Linky - DL Art - Ends December 31

Elf,  (project inspired by the holiday season) - Red Carpet Studios - Ends December 31st

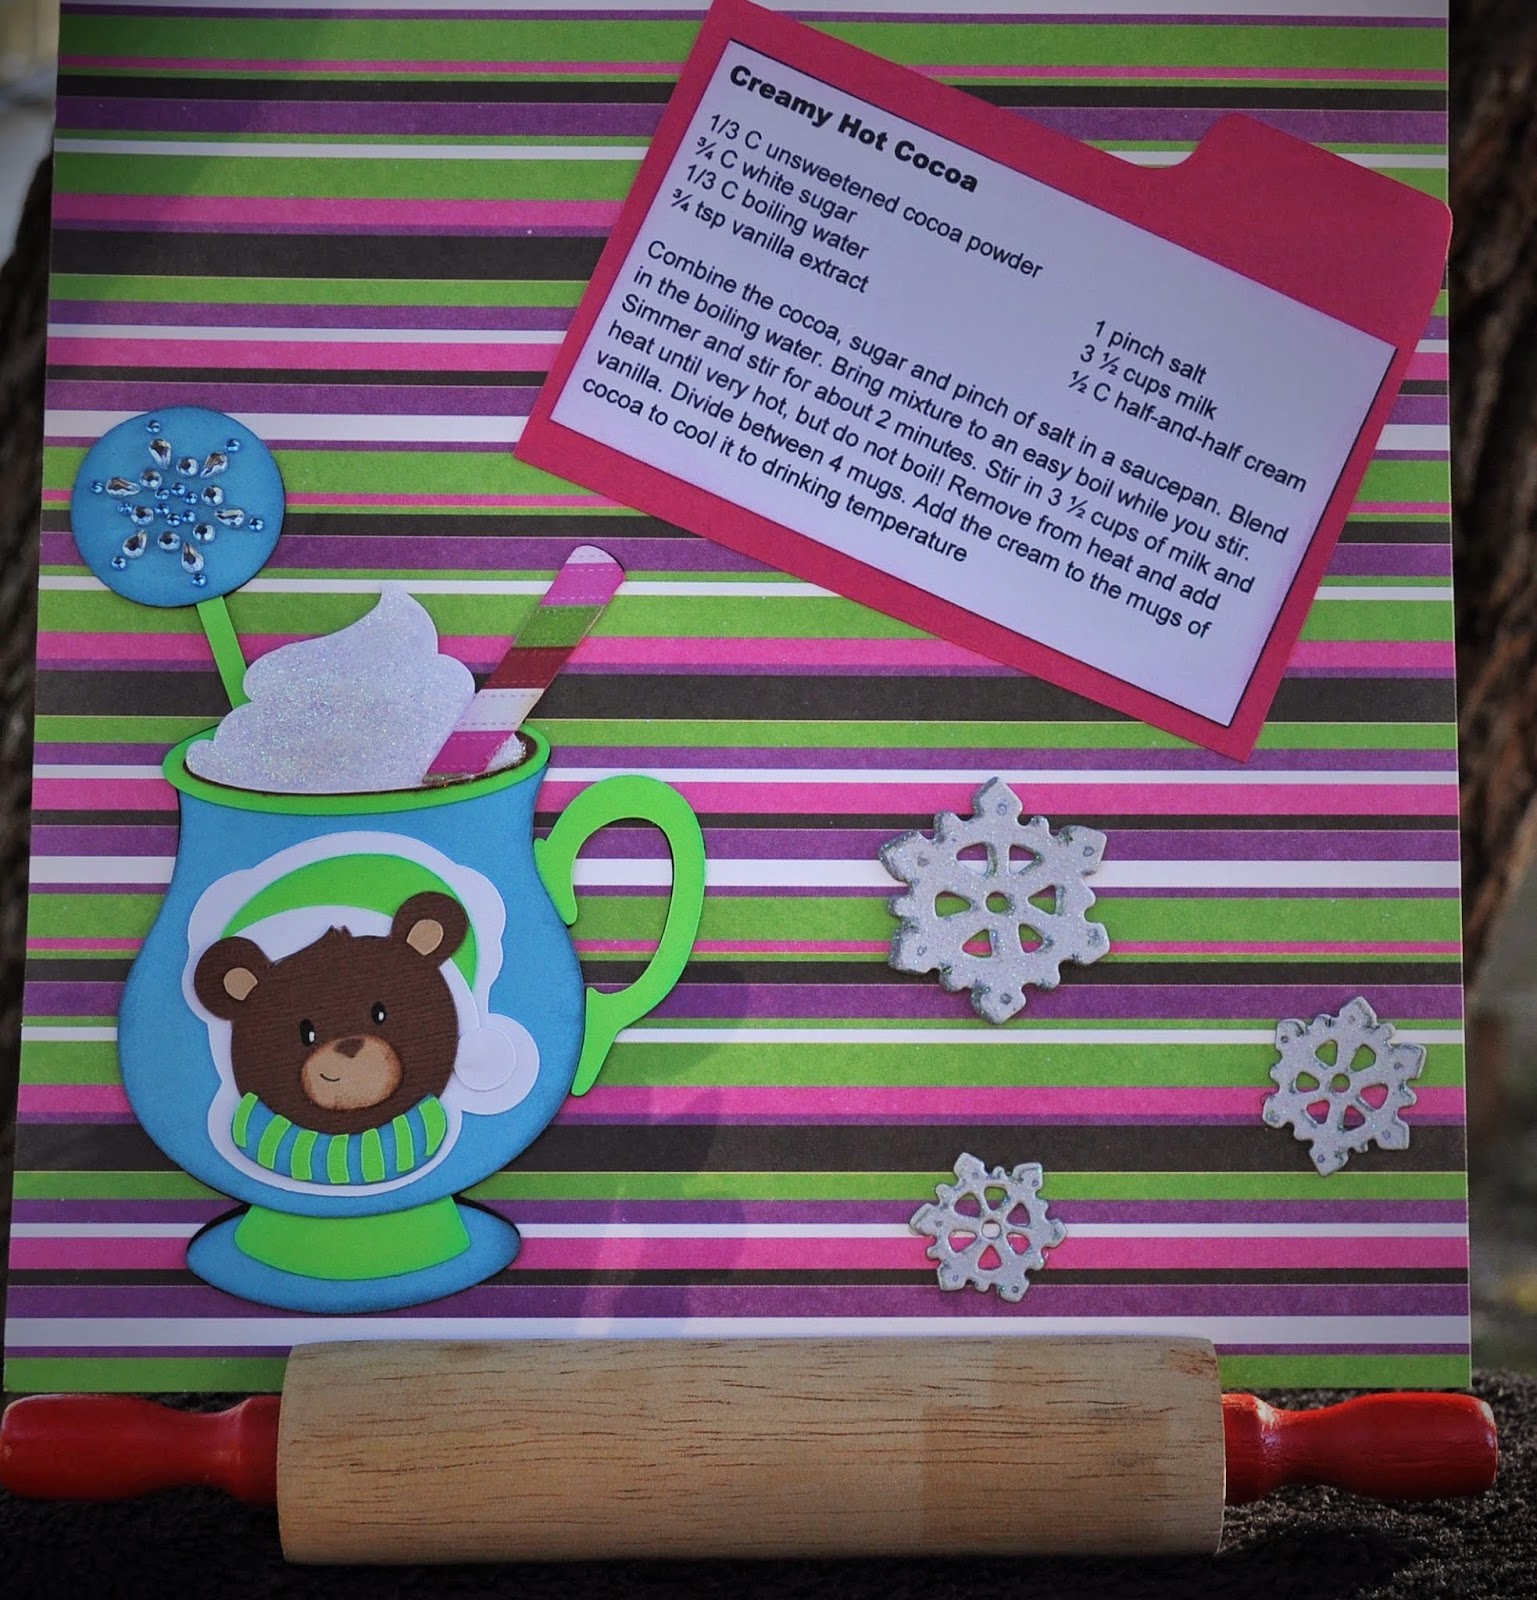
Creamy Hot Cocoa Recipe Page

Here in Florida we seem to be having a love - hate relationship with the weather.  One day it's "cold" and the next it's warm.  Today was a mixture of both depending on which side of town  you decided to be in.  A 30 minute distance between areas yielded at least a 5 degree temperature difference and I wasn't too happy about it as I am a warm weather lover.
 
Needless to say, cold weather leaves me drinking a lot of coffee, hot tea and/or hot chocolate.  So today I decided to make a recipe page using the Cute Cocoa Cups files from Too Cute by Jessica. 
 
I have to admit that I did some changing up to the file though.  I opted not to use the penguin that the file had for the stirrer and I also opted to use a pre-printed striped paper for my straw rather than using the pieces to create stripes that are in the file. 
 
For the 'froth' on my cocoa cup I used some Tulip brand glitter paint that I heat embossed to make it puffy.  (It doesn't show up too well in the picture.)  I also chose to use a rhinestone snowflake that I found in my stash for my stir topper.  I thought this would go well with the chipboard snowflakes I wanted to use on the page.
 
And there you have it.  A quick, easy scrapbook recipe page.