Watering Flowers - Mother's Day Card


This card was inspired by one that I saw in the March issue of CardMaker magazine. Only that one used stamps to create their look and since I don't really do stamps I used my Cricut to create mine. What really drew me to this card is the fact that the watering can moves so as to give the illusion of the flowers being watered - thus the title for my card.

For this one I used the following cuts:

Cricut Sampler (or Walk in my Garden) - Watering can at 1 1/2"

Indie Art - Butterfly and tears scaled down from 1" to the size I needed

Mickey & Friends - Flower border at 3" and then cut apart (I just found it easier to do that way)

Paper Doll Dress Up - Fence at 1 3/4"
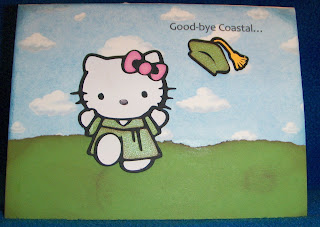
Hello Kitty Graduation Pop Up Card

My oldest daughter is getting ready to gradute in a couple weeks from the community college she's been attending in Brunswick, GA and has been accepted to Armstrong Atlantic State University in Savannah. Unfortunately I will not be able to attend the ceremony as my other daughter is in exams with her honors classes here at home. So I wanted to create a special card and set about last night on the design and cutting and finished putting it all together this morning.
For this card I used the following cuts:

Hello Kitty & cap - 4" (outfit cut to be in the school colors)

Hello Kitty in car - 3 1/2"

Tree from Camp Out - 4 3/4"

Sun from Pooh & Friends - 1 1/2"
Pennant from Locker Talk - 1 3/4" (cut to be in the school colors)

The road was created simply by cutting a stip of black paper the length of the card and then notching to fit around the pop up pieces so that it would slide in to the center of the card for placement.

Boy Scout Banquet Invitations

My nephew just passed his test/s to achieve the highest rank possible and his parents are putting together a banquet to celebrate. My sister asked if I would create the invitations because she didn't like any of the cards she saw so I asked her what she was looking for and this is what we came up with.

For this card I used:

the mountains cut as different sizes from Camping Out, .

the hiker cut at 1 1/2" from Going Places

the "patch" was cut from Accent Essentials at 1" and then sized smaller to fit my needs

The oath was created in MS Word

Friendship Bouquet

This project was inspired by one that I saw on the Splitcoast Stampers message boards. (Sorry I don't remember who posted it over there in order to give full credit) When I saw this I knew that I had to try my hand at it so I came home the other night and sat down with Design Studio and recreated the card.

I had a lot of fun putting this together and really love the way that it turned out.

For this project I used George, Sesame Street Friends, Graphically Speaking, Mickey and Friends, Accent Essentials, Tags, Bags, Boxes and More and my Cuttlebug.


Butterflies & Irish Blessings


This card began as a need for creating a project using ribbon for the current contest over at Bitten by the Bug. So I pulled out my stash and saw this one with the butterflies and knew that I had to use it.

Next was trying to figure out what to do with it. Then I remembered this cool idea I saw over on the Splitcoast Stamper boards where another lady used ribbon as a frame. Great! Now I'm getting somewhere....all I have to do now is figure out what I want to use as my card front. Oh and let's not forget the important inside sentiment.

So I opened up the document that I have all my sentiments saved into and found one that I thought was perfect. It says: May the wings of the butterfly kiss the sun and find your shoulder to light on to bring you luck, happiness and riches today, tomorrow and beyond.

Boyscout Layout


My grandad used to be a Scout Leader before he passed away a few years ago. Every summer he taught the boys marksmanship during the summer camps and this pic is the last one that was taken right before his health took a rapid decline.

This was very easy to create and I based this layout on a card prototype that I am working on for my sister. Once that project is complete I will share it with you.

When Life Hands You Lemons


I got the idea for this card during one of my awake times the other night; however, while putting it together I realized that I still have a lot to learn when trying to modify certain cuts.


There's not really anything special to this one just a lot of cutting, inking and strategic placement.

When in Doubt - Spinner Card (with video)


So here is yet another new technique that I wanted to try - Spinner Cards.
This was fun to do, but I had to make some changes because I could not find a 1/2" circle punch when I went to Michaels and all I own is a 5/8". Not much of a difference to be sure, but enough to have alter the directions followed. And speaking of directions, you can find them at the Splitcoast Stampers website by clicking on this link here: http://www.splitcoaststampers.com/resources/tutorials/spinner_card/ststampers.com/resources/tutorials/spinner_card/
For my first attempt at this type of card I chose to work with the cow from Animal Garden - thinking that was the cute one. However, it turns out the one I really wanted (and will use next time) is the one from Paper Dolls......oh well, live and learn right? The cow on the outside of the card was cut at 3" and the one for the inside was cut at 2".

Another issue I ran into when putting the card together was that I did not think about the inside being raised and the card front therefore needing to be longer than usual with room for the special fold that would be needed to accomodate the inside. So after putting the card together I had to do yet some more quick thinking and created the special fold so that the card would close. This now left the front a little bit shorter and needing something to keep it closed. To accomplish this I folded another glue dot in half and placed a flower in the bottom center of the card to act as my closer - problem solved.


I have also created a 5 second video so that you can see for yourself just how this card works. Again, it was a lot of fun putting the first one together and this was certainly my learning curve but I will create more of these....


Wanted to be Sure - Pooh Friendship Card


I was looking for quotes to use last night for a new technique that I wanted to try. But then I came across a quote from one of the Pooh stories and my original card was abandoned for this one.

I cut the bridge at 4 1/2" and Pooh and Piglet were cut at 2 1/2". The grass, water, and sand areas were cut twice, pop dotted and layered for a dimensional effect.

The inside sentiment says: Piglet sidled up to pooh from behind. "pooh!" he whispered. "Yes, Piglet?" "Nothing," said Piglet, taking Pooh's paw. "I just wanted to be sure of you" - A.A. Milne

Flowers Are Our Friends


Yet another new technique that I came across in one of my books that I have had forever and am just now actually using. This is a rather simple technique that can yield beautiful results.


Behind my flower cut outs (from Graphically Speaking) is a "woven" page. To create this page I chose three complimentary colors and tore them into strips. I then began weaving them together alternating colors in each direction. Of course after several "weaves" I had to tape down my top edges so that they would stay put while I finished creating the size page I needed.

Once done with the weaving I simply glued my cover page on top of the weave and then adhered to my card front.

The butterfly is from the cut and emboss folder for the cuttlebug. I cut the butterfly out twice so that I could layer and pop dot for dimension. The embossed buterfly was also inked lightly to help bring out the embossing.

The sentiment for this card reads:

In joy or sadness....

...flowers are our constant friends

-Kazuko Okakura