Showing posts with label Apex Cuttable Designs. Show all posts

Little Biker Man

After a couple months of my heat press being "packed up" I was finally able to break it out and play again.  Because it had been so long I was actually nervous about using it.  I had to remind myself about how to cut my heat transfer vinyl and what settings to set my press for.  Something that I used to be able to do without even thinking.

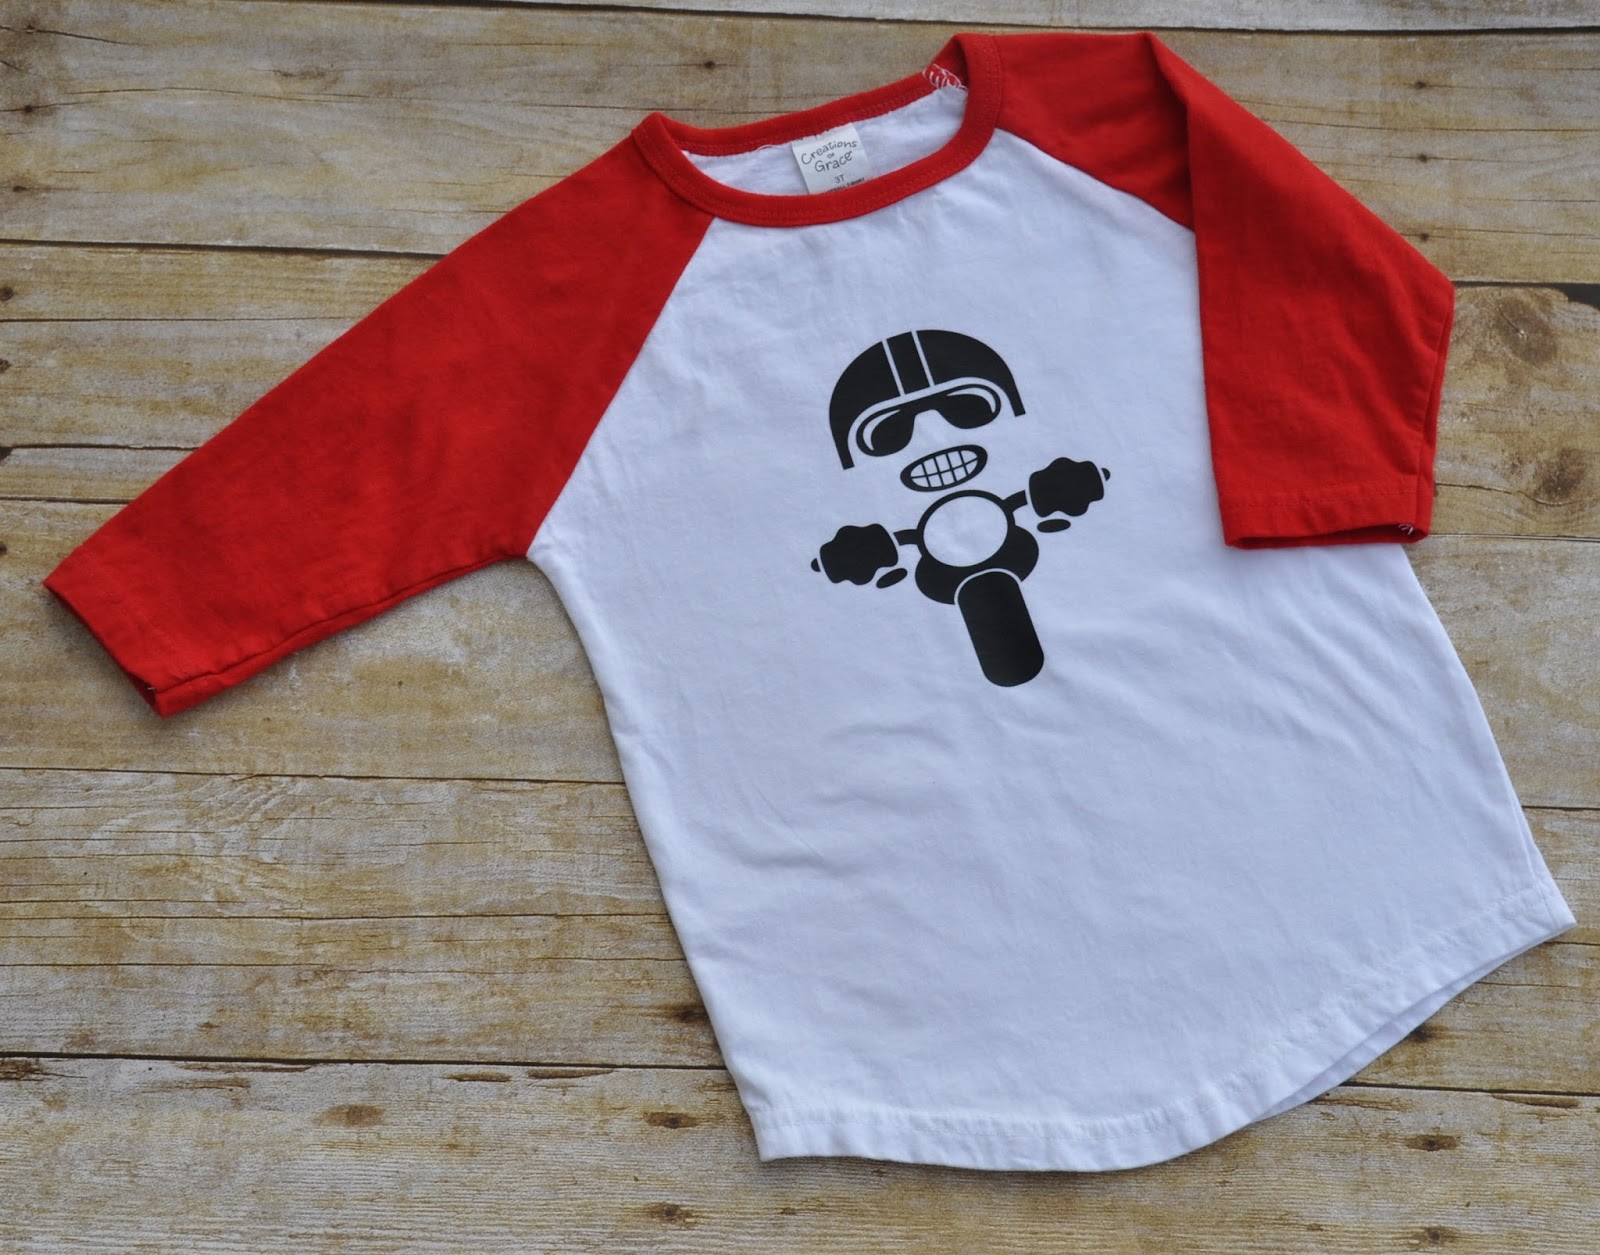
Fortunately I didn't have to think too hard and getting back into the swing of using my heat press was much easier than I anticipated.  Thank goodness too because I've been holding on to this awesome Biker Pack file from Apex Cuttables just waiting to create a little boy's tee with it.  

This amazing file has five different designs and each one of them are just as cute as ever.  I love the way that this particular design pops on this baseball tee.  Those red sleeves and this great little biker go so well together don't you think?  

I love this one so much that I need to go buy a few more tees so I can cut the other designs and create a complete line of little boy biker tees.

Love You, Coffee

I'm excited to share today's project with you because I think it's just the cutest thing ever.  While browsing through files over at Apex Cuttable Designs I came across this Love Coffee design.  It immediately made me think of my oldest daughter who is a coffee addict.  And so of course I had to have this design so that I could put together a little gift for her.

Instead of using the same old, boring black vinyl that I generally use on my white mugs I opted this time to use a red vinyl.  For my vinyl projects I like to use the Oracle 651 vinyl since it's a more permanent vinyl with a life expectancy of up to 6 years.  I have 'bumper sticks' on my car that are now six years old and they look just as new as the first day I applied them.

Now I just need to find some of the edible coffee beans so that I can slip a pouch of them inside the cup and give this to my daughter.  I know she'll love it.  Only draw back might be that the cup isn't big enough.  🤣

Sale Sign

What do you do when you have merchandise that you want to move out?  You have a sale right?  During craft show season this can be a bit tricky.  How do you let your customers know that you have one going on?  Well you post a sign - or two of course.
 
See when I do most of my craft shows it's not just me in the booth.  My mom, sister and I will buy two or three slots and we'll set up together.  The pro to this is that it helps to really draw in a crowd for us because of the variety of merchandise we can offer.  They crochet  and paint.  I papercraft, loom knit, sew and embroider.  The con is that our booth can seem very disorganized in that we do not tend to create multiples of items but rather one of a kinds. 
 
A while back work was getting rid of all these small sign holders, and since the office manager knows I craft she figured I could use them.  I went through the stack and took several of the ones that were in the best shape.  Not knowing what I'd actually use them for I set them on the shelf.  A couple months later I came across this Sale It design from Cuttable Designs and knew it would be perfect.  After all our area is know as the World's Luckiest Fishing Village.
 
In my stash I had scraps of this great water paper that I used as my sign insert.  I then cut the sale design from Oracle 651 and applied it to the front of the acrylic holder. 
 
Now I have a sign that's perfect for grabbing the attention of our customers.

Pulp Fiction Wall Art

 
My husband loves the movie Pulp Fiction.  So, when I saw this file Pulp Fiction file over at Cuttable Designs I knew that I had create something with it.  Now hubby is not the type to wear something like this on a shirt so it would have to be something different.  Something he could display.  Since he has his own game room I thought I'd create a piece of wall art for him.
 
He recently went through a bunch of boxes he's had in storage and one was full of nothing but different award certificates he had framed.  Given that he's not been with that company for almost 10 years he decided it was time to take them out of the frames.  And when he did I snatched a couple of them to "recycle".
 
After cleaning the glass and allowing it to dry I grab my bottles of Purple Twilight and Stream colored alcohol inks.  I applied a couple drops of Purple Twilight to the applicator felt and began stamping across the glass.  I then applied a couple drops of blending solution followed by the Stream color and started stamping across the glass in the opposite direction.  As I did this I ensured that I filled in any spots missed while stamping the purple.  Then I decided to gentle smear the colors together on one side of the glass to add more textural look.  Once satisfied with the ink coverage I allowed it to dry overnight.
 
Once the ink was cured, I added a sheet of white paper behind the side that was inked and closed the frame.  Then, on the outside of the glass I applied the vinyl design.
 
And now, my hubby has a cool and unique piece of art to hang in his room.


Star Wars Wall Art

I decided to add another piece to my alcohol ink wall art collection.  Back around Valentine's Day I saw this fun Star Wars Valentine themed file over at Cuttable Designs.  At that time I wasn't sure what I'd do with it but I knew I wanted to use it for some crafty project.  Then after trying the alcohol inks for the first time I knew what I was going to do.
 
Since sharing the Harry Potter wall art I made last week I've received a lot of questions on FB about how I did it so I thought I'd break down the process here as well.
 
The first thing to do is to clean the glass with Windex and allow it to dry thoroughly before beginning the ink application.
 
I don't know if there's another brand out there or not but I used Tim Holtz alcohol ink for my project.  They're acid free, easy to apply and when applying to glass if you don't like the outcome you can wipe the glass clean with rubbing alcohol and start all over. 
 
I applied a couple drops of Sunshine Yellow to my ink applicator and began dabbing and across the glass in different directions.  I then applied a couple drops of blending solution and then a couple drops of Sunset Orange to the applicator and began the same process dabbing over the yellow as well as covering some of the 'missed' areas.  I carried this color scheme down about two thirds of the glass.
 
I then changed my felt pad and continued this process using the color Purple Twilight.  (These three colors come together in one pack - called Summit View.)  After looking at the glass from the opposite side I decided that I wanted a bit of blue in the mix so I changed my felt pad back to the first one I had used, added a couple drops of blending solution and then a couple drops of the color Stream.  (This color, my blending tool, solution and pads came together in the ink kit.)
 
After I finished with my ink applications I allowed the glass to air dry over night.  The ink dries pretty quick but since I was backing mine with paper I wanted to allow it plenty of time to cure.
 
The next morning I inserted a sheet of white cardstock between the side of the glass to which the inks were applied and the frame insert.  Then on the opposite side of the glass I applied the vinyl.
 
Now I have a fun piece of fan art to add to my wall.

Whale of a Pirate

I'm always creating fun shirts (and sometimes dresses) for little girls so when I saw this fun Pirate Whale over at Apex Cuttable Designs I knew it would be perfect for a little boy's top.  When paired up with this baseball shirt I found at Hobby Lobby it really screams fun.  I love how the red sleeves help to make the whale pop against the white background.
 
This design would be perfect for any little boy who loves pirates and I can even see using it for a pirate themed birthday party.  How fun would this be on little favor bags?  And did I mention that there's a second pirate whale in this file?  That means the two of them could be rotated on a birthday banner or used as cupcake toppers.  Oooooh, the possibilities are endless.
 
I mean seriously, this is a fun one that should be added to your SVG stash if you haven't done so already.  Not only are the possibilities endless but it's one of those quick and easy files to piece together and you know how I am about the quick and easy files.  When crafting time is tight there's nothing better.....
 
And now I'm off to enter my pirate whale into the following challenges:
 
Die Cuttin Divas - Animals - Ends February 26th
 
DL Art - February Linky Challenge - Ends February 28th

Chillin With My Peeps

A few days ago, my daughter brought over a couple articles of clothing that belong to my granddaughter saying that she thought I might want them to 'practice' on.  Well I was quite sure I knew what that meant so of course I accepted the challenge.
 
One of the pieces was a pink onesie.  Since tomorrow is Valentine's Day I felt it best to just move on to the next holiday.  So that is just what I did.  I moved on.....to Easter.  Now I don't know about you but when I think of Easter I think not only about the Resurrection or the Easter bunny.  I think about the candy.  You know.  All the chocolate and those squishy yellow peeps.  So it's no wonder why when I saw this Chillin With My Peeps file over at Apex Cuttable Designs that I had to create something with it.
 
The file comes with five different designs and each one is fantastic.  For now design five is the one I chose for this onesie.  I also chose to cut it from flock material and I'm glad I did because I love the way that it looks and feels.  After all little chicks should be soft and fuzzy, right?  And cutting this design in flock was super easy to weed and apply.
 
Now I need to decide on which design I want to use next....

Valentine Wagon

We are just a couple weeks away from Valentine's Day and I can't imagine any crafter out there that hasn't created at least one Valentine's project by now.  Usually by this time I've made several greeting cards but since Christmas I've been working more with learning how to use my embroidery machine and heat press.  This weekend was no different and after a few successful and some not so successful projects it was time to take a break.
 
This is one of my favorite projects I made over the weekend.  This is the Love Wagon from Apex Cuttables.  There are two fun wagons in this file but I only created one of them this weekend.  The other one I hope to do next weekend.
 
For this particular file I decided that instead of layering the white dots on the tires I would subtract them from the tire.  So in my Silhouette Studio software, I grouped the tires and the dots together and then clicked to subtract the object.  It made for a little bit more weeding but I thought this make it easier in the long run.
 
This is also the first time that I've used glitter HTV and I love the way that it turned out.  The picture really doesn't do the onesie much justice.  However, it's been pouring rain all weekend again so being able to get a good picture was not an easy task. 

 
The HTV I used were all Siser brand with the exception of the Love Script HTV.  That's a custom print vinyl that you can only get from The Vinyl Corner.  Fortunately for me they're located in my hometown.  Unfortunately for my husband, they're located in my hometown. 
🤣
He doesn't really mind though.  He'll tell anyone that if I'm happy and busy with my crafting then he can play his video games in peace and that makes him happy.  LOL

Baby on Board


My youngest daughter gave birth to her first child five months ago.  She and her boyfriend are both surfers so when I saw this Baby on Board design over at Apex Cuttables I immediately knew it would be perfect for making a car decal.
 
Using my Oracle 651 glossy I cut this decal at 6 inches long.  Before applying to the back window I made sure to clean it really well and then stuck it on.  I've used this vinyl for my car decals and have ones that have been on my car for three years now without any sign of color fading or vinyl cracking.
 
Needless to say my daughter loved her new decal.

Red Truck Ornament

Five more days until Christmas.  Four for crafting, and I am feeling the pinch.  I don't have all my presents made or purchased.  It's just been a crazy, busy, chaotic past few months.  But I'm getting there.
 
Today I'd like to share a Christmas ornament I made.  It seems that the latest trend is the vintage red truck - AND - YES - I jumped on the bandwagon.  I saw this Christmas Truck file over at Apex Cuttables and just had to sit down and play with it.
 
This ornament I did differently than all my others.  I didn't think that the glitter technique was right for showing off this fun, memory making truck.  So instead, I decided to fill the ornament with miniature Styrofoam balls, or foam pebbles.  This is the same 2 inch, flat disc ornament that I have used for the majority of my ornament making this year.  I find that they are much easier to work with than the round ball shapes.
 
If you haven't finished your gift making yet, these would make great little gifts to give to friends, family, teachers or other service providers you frequent.  Just add their family name and year on the reverse side of the ornament and it's personalized and ready to go. 
 

Meowy Christmas

Happy Thursday everyone!  If you're doing the Christmas countdown there's only 10 days left!  Are you ready?  I am but I'm still crafting too.  There are just too many great designs screaming to be made into gifts.  For example this Meow Christmas file from Apex Cuttable Designs screamed at me to be made into coffee mugs for my son and his girlfriend.
 
Is this not one of the most adorable things you've seen?  I mean it's perfect for a cat lover! 
 
So here's what I did.  I started with a stoneware mug from the Dollar Tree.  Then I cut my design from Oracle 651 vinyl (I buy mine from the Vinyl Spectrum) and adhered it to the mug.  Yep, it was that simple.  Now the thing is these mugs have to be hand washed because the heat from a dishwasher could cause the vinyl to lift and or wrinkle/shrink.
 
I can't wait to give them these mugs.  I know that they are going to love them.  In the meantime, I have more Christmas gifts to get made so be sure to stop back by and see what I'm crafting up.

Santa's Tie

I have a fun card I'd like to share with you today.  When I saw this design - Santa Claus Tie - over at Apex Cuttable Designs I knew it would be perfect for a card and I was right. 
 
I decided to cut my tie using a sheet from the DCWV Holiday Glitzy Glitter mat stack.  The white piece of the tie I ran through my embossing machine to add even more texture.  I had thought about adding glitter or flocking to the white but then thought that might detract from the red glitter of the tie and stuck to the embossing as an accent.  After piecing the tie together I added it to a pre-embossed card blank, also from DCWV.
 
The stamped sentiment is from the Naughty or Nice stamp set by My Craft Spot.  Sadly, they are no longer doing business.
 
And now this card is on its way to my I Run 4 Buddy.  I know he's going to love it.

Grinchy Mugs

From lights to cutting boards and now mugs.  Not sure what I'm going to do when I run out of fun things to put vinyl on.  Of course I'm saving for a good heat press, but until then....
 
I have a couple more fun mugs to share with you.  This time they're Christmas mugs.  I found this wonderfully fun Christmas Grinch Hand file over at Cuttable Designs and thought it would work great on these mugs.  Now this file was originally created to have a monogram in the center of the ornament but I wanted a solid bulb so I released the compound path and filled it in.
 
I love how the colors of the vinyl pop against the white mug.  Someone is sure to love these fun mugs.

And now I'm off to enter this card into the following challenge:
Hiding in my Craft Room - Any Holiday - Ends December 3rd

"Crimson Tide" Elephant Mugs


It's nice to finally be getting back into my craft room after being away for almost two weeks.  I've been out sick, on vacation and then yesterday celebrated my birthday and had the best one I've had in a while.  Not only was I surprised with a fabulous get together with my husband and children but I was also surprised with one of my children moving back home!  Talk about one happy momma - that was definitely me. 
 
Last night after work I sat down at my crafting table and started putting together some of the projects I've had planned for Christmas.  And today, I'm sharing with you my set of "Crimson Tide" Elephant Mugs.  I'm a big Alabama fan, right along with several of my in-laws.  (My husband and his sister are the only Auburn fans in the family.)  So with that being said when I saw this Elephant Alabama Cuttable Design from Apex Cuttables it was a definite must have.  This was so very easy to piece together and I LOVE the way that the design turned out on these white mugs. 
 
I used my go to Oracle 651 glossy vinyl for these mugs.  Not only is it a more "permanent" vinyl but it's more resistant to fading and can withstand the handwashing better than a generic type vinyl.  Now I just need to get some more brown vinyl so I can make some of the ones with the football design.  That's right there's several designs to chose from in this file.  Four total to be exact, and they're all cute as can be.
 
 
And on the flip side of my mug I just had to place the Alabama "A".  As for my mugs, well those came from the Dollar Tree.  Gotta love the deals you can get there. 
 
Now to go get some more of these cuties made....

Daddy's Lil Monster

Do you ever have one of those days where you know you want to craft something but you don't know what? I mean you have the supplies and everything sitting in front of you but you think to yourself, "now what"?  I had that experience going on with this last jar I had for turning into a night light.  I've made several of them by now and was running out of ideas for what to put on them so this one just sat. 
 
That is until I found this awesome Halloween Skull Girls file at Apex Cuttable Designs.  Talk about files that are perfect for not only the Halloween fan, but the one who's a bit "goth" or how about someone who loves Harley Quinn?  I mean that's what I thought when I saw the skull I used for today's project.  This would make a perfect Christmas gift don't you think?  I know some of my kids will love it.
 
If you agree, keeping reading because here's how I made my jar night light:
 
I used one of the glass jars that I found at Hobby Lobby.  After wiping down my jar with alcohol I cut out my design using Oracle 651 from Vinyl Spectrum.  I decided to add some verbiage to the design and decided on the verbiage from the T-shirt that Harley Quinn wore in the movie Suicide Squad.  For this I used a font from dafont dot com called Alice and the Wicked Monster.
 
When you peel back the vinyl and weed everything to place on the light be sure to keep the thin heart shape from the eye.  That's what I used for the heart accent just off from the verbiage.
 
Once you have the vinyl adhered to the jar all that's left is to spray a bit of frosted glass on the jar.  I used Rustoleum brand for my project but there others out there that work just as well.  Just remember to clean the jar with a soft cloth.  Immersing in water can damage the finish - especially if there's soap or other agents in the water.
 
To finish off my light I took two strands of fun fur - one red and one blue - and tied them around the top edge.  Add in a small, battery operated tea light candle, and there you have it.
 
A quick, fun gift giving idea just in time for Christmas.

Superhero Night Lights


Now that November is here it's time to get cracking on all those Christmas gifts we need to get made.  Some of my boys are die hard comic fans and so when I saw this awesome Superhero file at Apex Cuttables I knew I had to have it.  There are seven heroes included in the file and these are just three of them.
 
The way that these designs are done they'd be perfect for use on glass blocks, jars, car decal, t-shirts (which I hope to be able to do next month) and night lights like I've done.  Why you could even use these to decorate stockings for Christmas.
 
 
These are night lights from the Dollar Tree.  They call them fashion night lights because initially the round cover has a printed graphic.  But with a minimal amount of swirling the cover around in some acetone nail polish and light rubbing with a paper towel or cotton ball, the graphic is easily removed.  After removing the graphic I wash my covers with dish soap and allow to dry.  (IMPORTANT:  Do NOT allow the cover to sit still in the acetone as it will cause the plastic cover to "melt")
 
 
While the covers dry I find the design I want and cut from vinyl.  (I use the permanent Oracal 651 from Vinyl Spectrum) 
 
 
And now I have a fun, made from the heart stocking stuffer item for my boy's this Christmas.  It doesn't get much easier than this.

H-Owl-oween Treat Bag

Who doesn't love a surprise goodie bag full of sweets?  Every Halloween I love making treat bags for people at the office and this year is no exception. 
 
Today I'm sharing one that I made using one of the Halloween Owl Cuttables from Apex Cuttable Designs.  These spooky hoots sure make up easily and look at how cute this one is decorating my treat bag.  And those bats you see circling around my owl are part of this fun Halloween file.
 
My treat "bags" are really purses from Jaded Blossom.  After piecing together my owl all I had to do was use my Scotch adhesive glue and adhere him to the bag.  Now I have a great, fun gift to give to a co-worker.

Dolphin Night Lights

Sometimes living around the World's Most Beautiful Beaches and other water ways can have its advantages.  Yes, during tourist season it can be a nightmare with all the highly congested two lane roads and stand still traffic that makes you feel like your living in Atlanta.  But during the off season we locals can sit back and enjoy what others travel so far to see.
 
Every day on my ride to work I have to cross a five mile long bridge across the Choctawhatchee Bay and if I'm really lucky I might get to see dolphins out in the water playing.  I've even seen them somewhat close when we gone out fishing.  For whatever reason seeing those dolphins always brings a sense of joy. 
 
So of course it was no surprise that I had to have this Retro Dolphin file from Apex Cuttable Designs.  Not only does this file translate beautifully for night lights but it would make some beautiful designs on shirts, beach bags or other similar items.  And one day in the near future I will have my heat press so I begin using these gorgeous designs to do some of that.  My husband and I finally found the one we are going to purchase so I'm sure it'll be here by Christmas.  :)
 
To create these night lights I started with ones I found at the Dollar Tree.  Removed the existing design.  (Directions in this post here.)  And then I chose two of the different retro dolphins to use on my lights.  Now I have lights that are perfect for use with any beach themed décor.


Football Turkey

You know the seasons are changing when the temperatures are cooler in the evening/morning, football is in full swing, the leaves start changing color, and turkey is on its way.  Since today is College Football - Roll Tide - I thought I'd share a card I created celebrating the return of Fall.  Now don't get me wrong, summer is my favorite season.  I love being outside in the bright, warm sunshine.  But I love what Fall has to offer too.  I just hate that it's the start of colder temperatures.
 
So for today's project I created a card using the Thanksgiving Turkey Football file from Apex Cuttable Designs.  I love that this turkey was made using footballs for the body and feathers.  To me it was such a clever idea.  And since it was designed more for use with vinyl I made one simple "modification".  In Silhouette Design Studio, I copied the turkey svg, released the compound path and then had a solid cut to use for the base of my turkey.  This allowed me to have the white threads and edges of the football behind the feathers.
 
The stamped sentiment is from the Hey Pumpkin stamp set from Craftin' Desert Divas.  And by the way, this is one of the stamp sets that Tara is retiring.  That means it's on sale right now and once it's sold out - that's it.
 
I also used some Purple Twilight and Sunset Orange skittles from DoubleClick Connections.

Friday Football

WooHoo!  It's Friday today.  And not only does that mean the end to a grueling work week for most of us, but it also means it's Friday Night High School Football.  I'm sure that most - if not all of you - have just as much football spirit in your town as we do in our little town of Niceville, Florida.
 
Admittedly I haven't been to a game yet this year, but in my defense I've been babysitting a less than three month old grandbaby every Friday night.  But the really good football rival games have yet to occur so I still have time.
 
  
In the meantime, I'd like to share some football night lights that I created using the recently released Football Player file from Cuttable Designs.  When I made these I gave thought to adding the local football team letters but then I realized that our rival teams are really just a stone throw away and since I didn't want to disenfranchise anyone I thought it best to just leave these as they were with the cut out.
 
 
To create my nightlights I used the lights purchased from the Dollar Tree, removed the printed design with some acetone, washed, dried, and applied my own design.  The vinyl used on my nightlights is Oracle 651 glossy.  It's my favorite vinyl and I personally prefer the glossy to matte finish.
 
 
The football player file was a great one to use.  I really needed some more masculine files and this one fit the bill perfectly.  Now if only my boys were younger or actually liked watching football.......not sure where I went wrong on that one.  But hey one daughter out of six kids is better than none at all.  :)

Happy Crafting everyone.