Final Post

After much thought and several discussions with my husband I have come to hard decision of closing down my webstore as well as my blog.  It's been a great nine years and I appreciate all the visits and kind words that I have received from my readers.

It's been fun sharing my passion for crafting but as life takes its many twists and turns I find that I do not always have the time for crafting or posting on so many social media platforms.  So in an effort to not stress myself out so much I am cutting back.  

I'll still be on FB at Barbara's Spot of Sanity.  I just won't be posting every day.

Before I go though I thought I'd share a couple of my favorite projects that I've made along the way....

Do you remember the glitter craze in 2009?  I used that technique on so many cards that year, but this was my favorite.  So much so that I have held on to this card.

How about the CD calendars in 2010/2011?  This was another fun craze that I joined in on.  I don't remember how many of these calendars I made but they were fun.

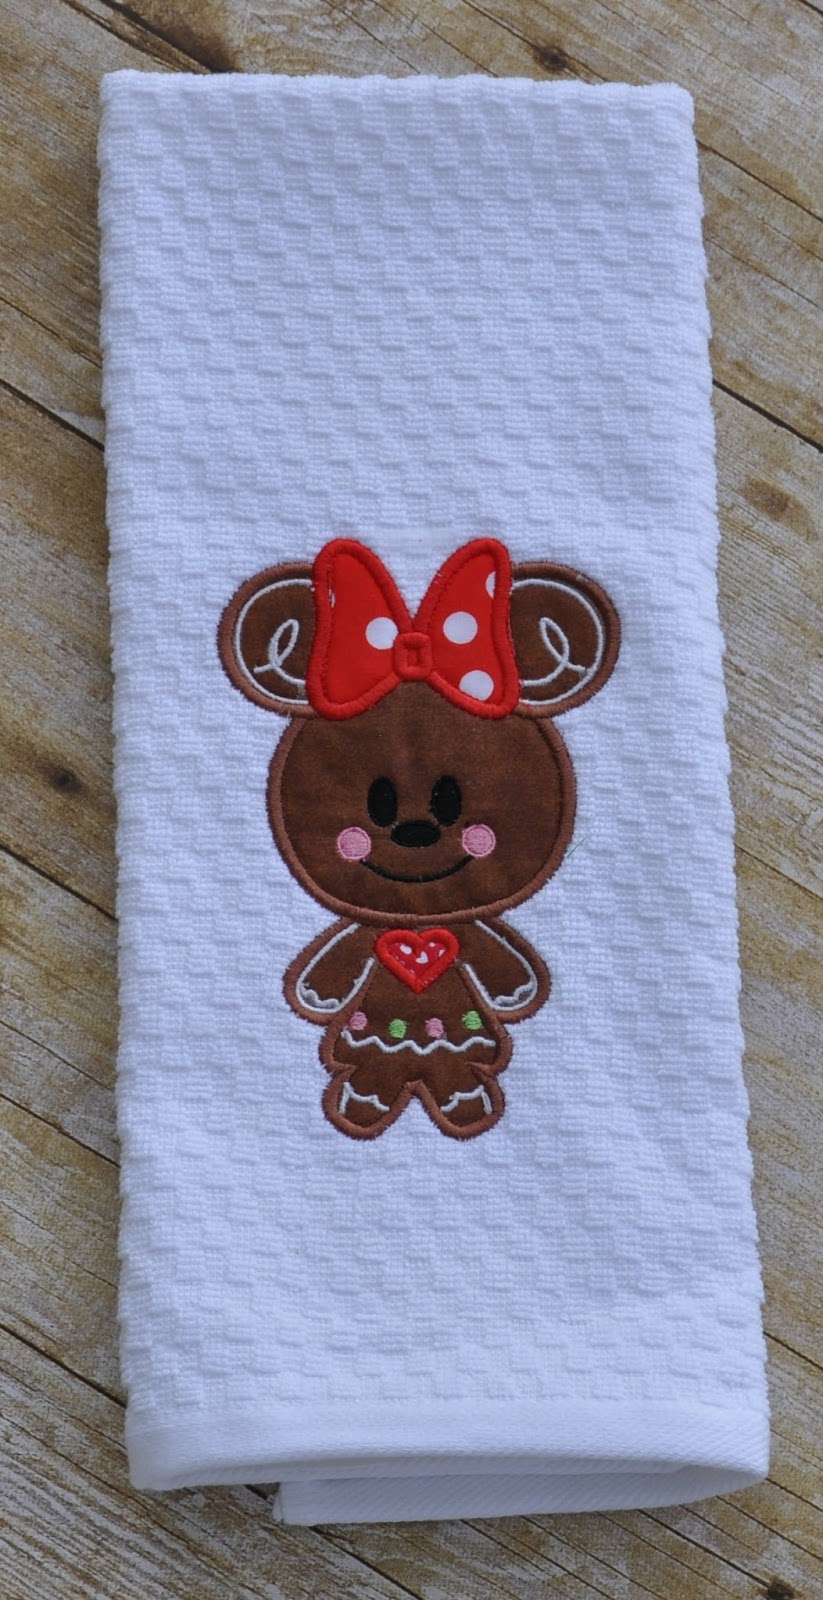
In 2012 my hubby bought me my first embroidery machine.  It was a small one from Joann's that we picked up on Black Friday.  After several attempts to learn how to use the thing properly I became frustrated and packed it away.  But not before I successfully embroidered these cute marshmallow snowmen.

In 2013 we made our first trip to both Disney and Universal Studios.  It didn't take us long to realize that we were more in love with Universal and the following year we became annual passholders.

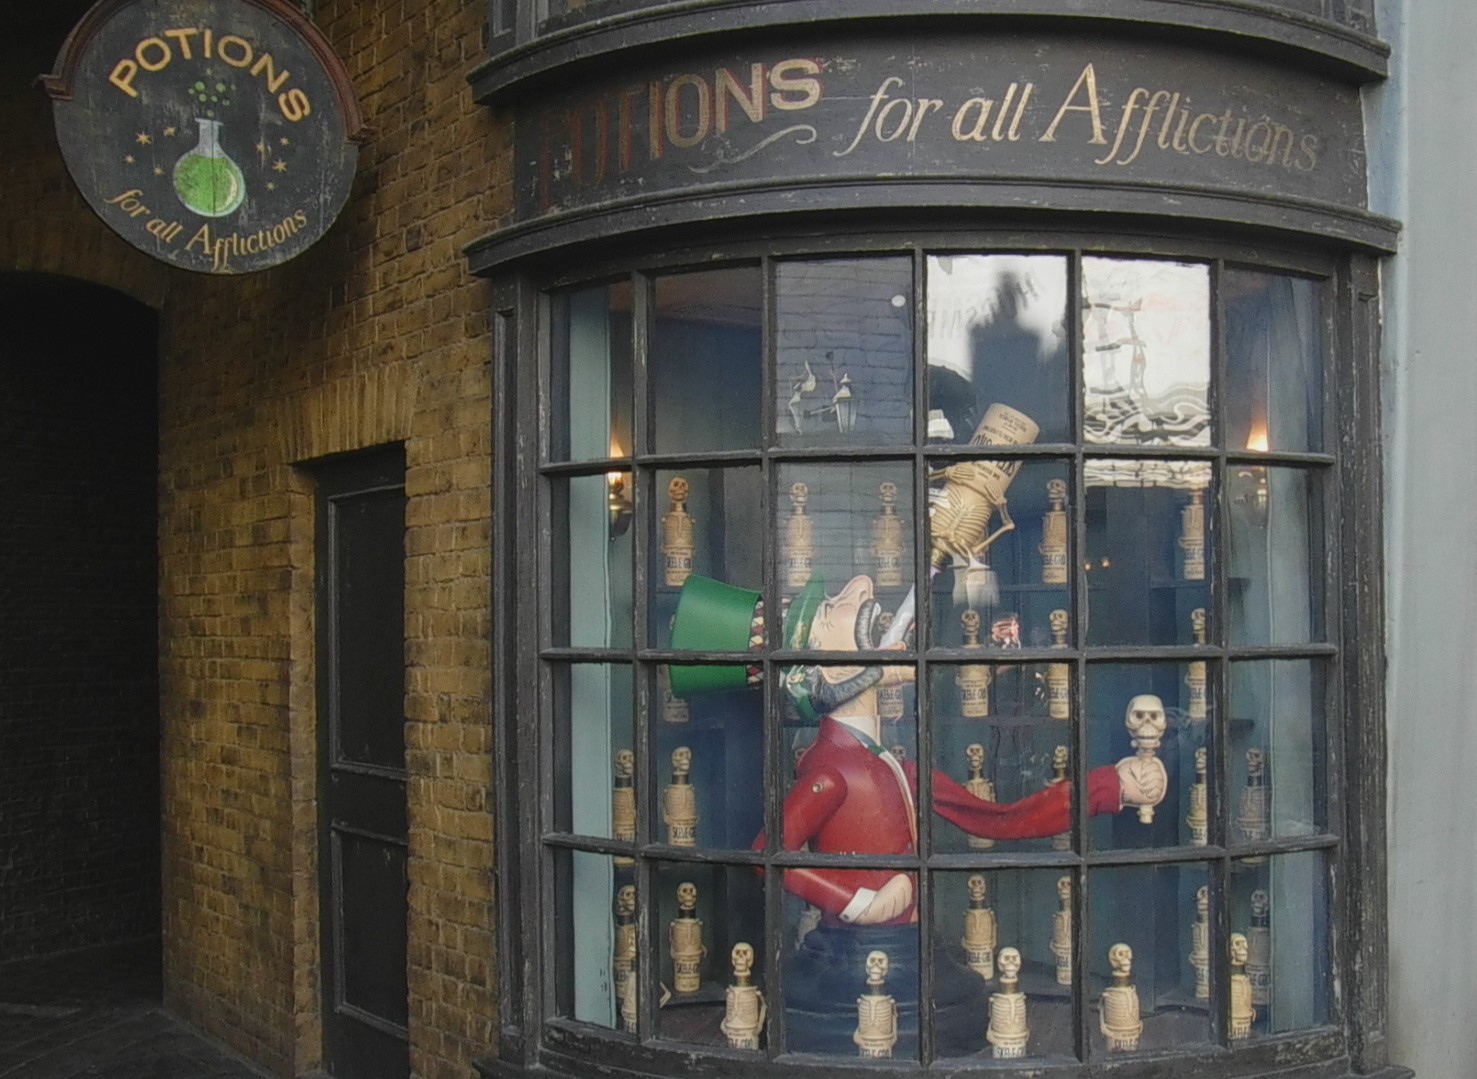
And if you've been following my blog for any period of time you've probably realized that I am a bit of a Harry Potter fanatic.

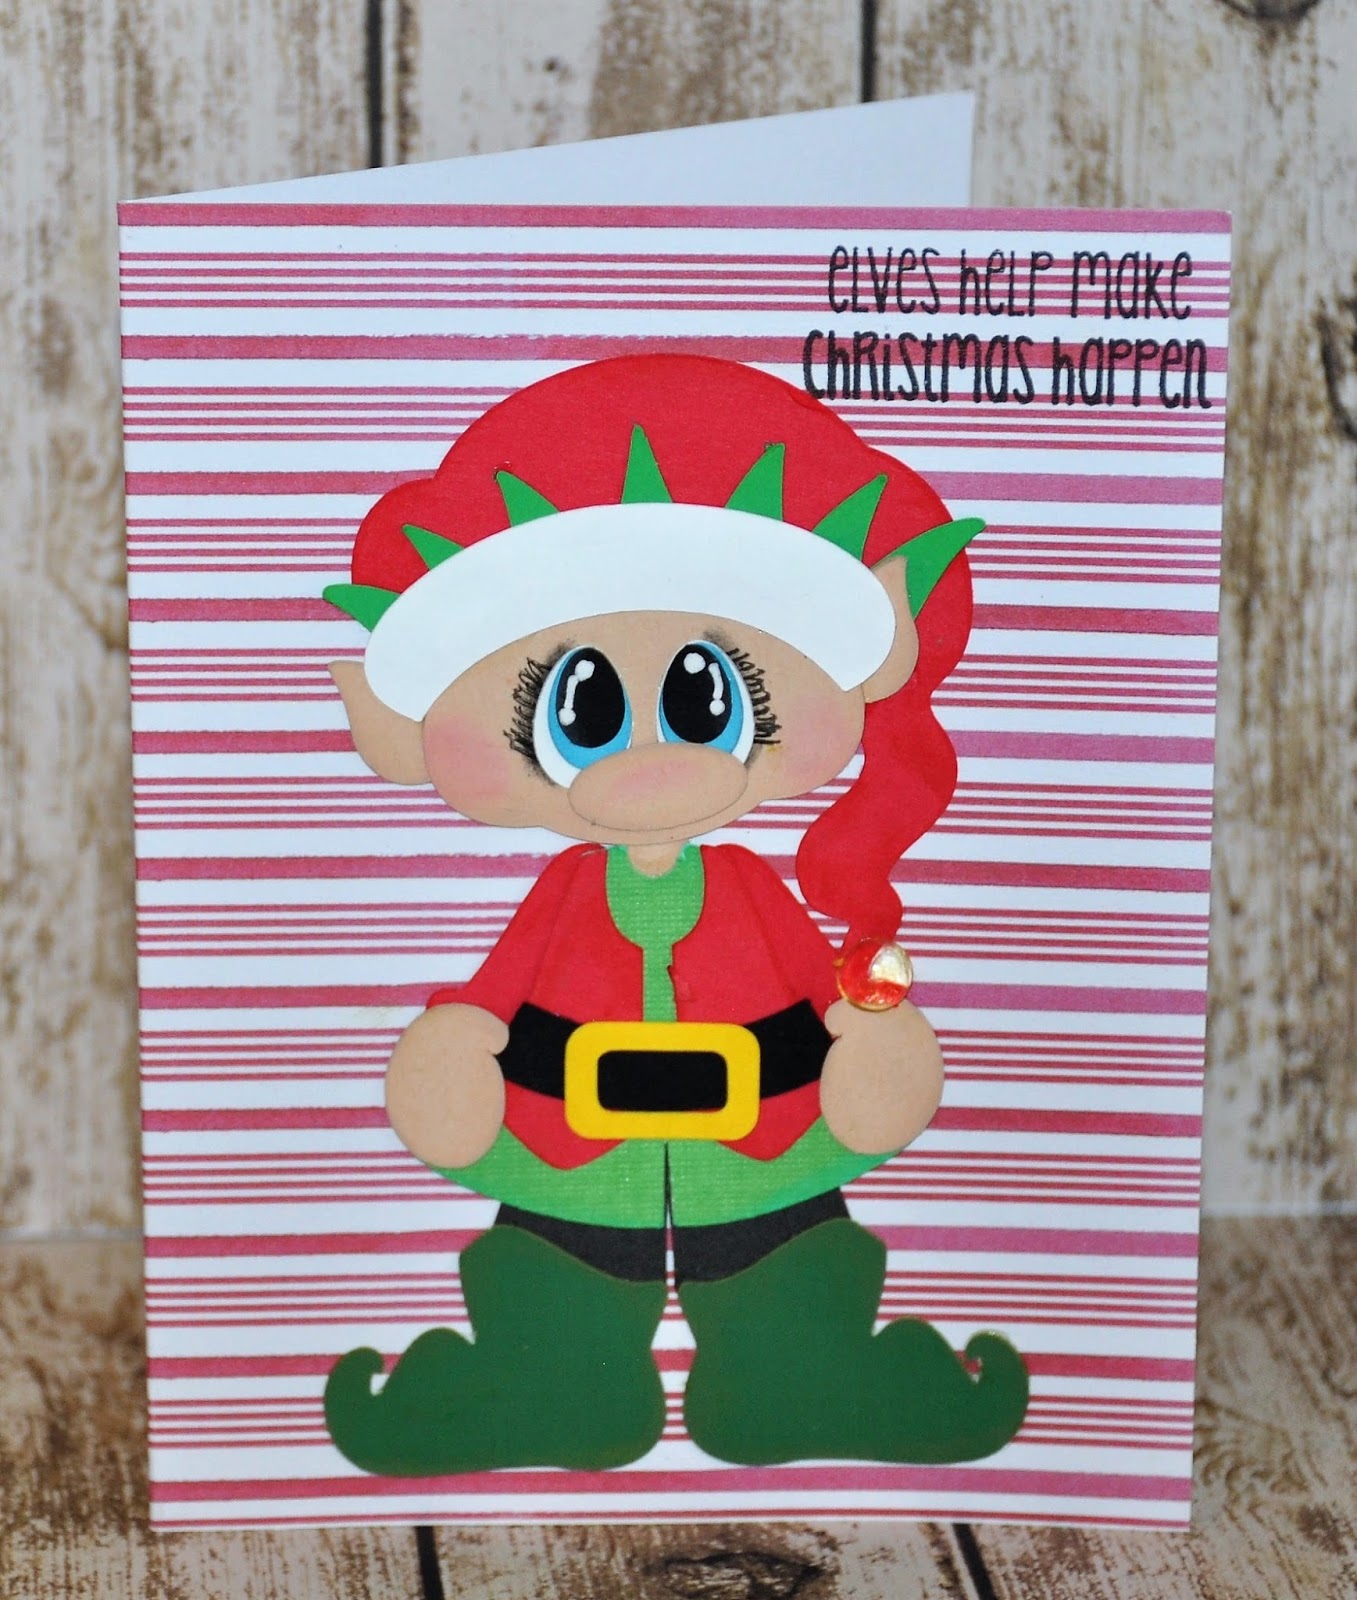
In 2014 we joined the Elf on the Shelf craze.  We had a lot of fun with our elves that year - especially since we were able to find elves for each of our collegiate teams.  I pull for Alabama and hubby pulls for Auburn.


In 2015 I really got in to using Jaded Blossom stamps, and this was a project that I made for one of the customer appreciation challenges.

Last year I decided to make some Halloween décor for hubby.  Halloween is his favorite holiday and so I thought I'd surprise him with a few things.  This Nightmare Before Christmas tree was one of them.  (The ornaments actually glow in the dark.)

And that brings me to this year.  When our youngest son moved out of the house that gave me the opportunity to move into a larger craft room and this time I went to town with my décor.  I decided that I wanted a Harry Potter themed room and so I painted and decorated in said fashion.  (I'll be adding more décor after our trip in a couple weeks)  As part of that décor I made this wand holder for the wands we've purchased thus far.  Best thing is that we can add another plaque or two as we go.

Thank you all again for this amazing journey.  And if you want to continue along with me come on over and visit with me on Facebook.  You'll find me in my little Spot of Sanity there.


You're My Person

Today I have a quick and easy card to share with you.  It's another card where I let my background paper do my work for me.  I mean when you're in a pinch and need to create a card quickly why not take this route?

That being said, for this card I used the Stone Age file from Marjorie Ann Designs and chose to piece together the Pebbles character.  

The background paper is from the DCWV mat stack title the Kidosaurus Stack.

The stamped sentiment is from the Craftin Desert Divas stamp set titled Happy Thoughts.

Halloween, Snoopy Style

I have not really gotten into much of the Halloween spirit quite yet.  Not that I've ever been that big a fan.  It's more my husband's holiday than mine, but over the years I've started crafting more for it.  But like I said, the mood just hasn't really hit me yet.

Although I have made my first Halloween card.   This one features that adorable cool cat, Snoopy.  He's part of the Spooky Village set by Marjorie Ann Designs.

My stamped sentiment is from the Cardz Tv Stamps set titled Frankly Frightful.

Tic Tac Drink, Nightmare Style

Last year I made a few different tic tac drink games using glass cutting boards and dessert glasses from the Dollar Tree.  I had made a couple different Harry Potter styles, Star Wars and even an Army vs. Navy.  But then I was at a loss as for what other theme to use for my last set.  I thought about a DC Comic hero vs. villain.  However I changed my mind as I didn't want to use just one hero and one villain and that could become messy.

Eventually I settled on a Nightmare Before Christmas theme.  Deciding what characters to use for the shot glasses was easy.  It was deciding what I'd do for the tic tac toe board that was the hard part.  After much thinking the idea hit me to use a skeleton arm and hand as my board diagram.

I went searching through the various skeleton designs in the Silhouette Design Store, and found the perfect skeleton by Amy Robinson here.  I welded the different bones for the arm and hand together and sized them for what I needed to create my board.  

Now the hard part was adhering the vinyl to the glass board.  Needless to say, if I ever make another one of these I will cut the four different lines separately and adhere accordingly.

As for the images of Oogie Boogie, Zero and the Jack and Sally I used in the center - those were images I found from a search that I traced in my Silhouette software.


Walking Dead Christmas Ornament


We might be two months away from the start of season 8, but it's never too early to make some Walking Dead swag for Christmas.  (The new season starts October 22nd to be exact.)

When I was playing with my alcohol inks I decided to play around with some yellow and red which gave me a perfect canvas for this ornament.  After all the Walking Dead is all about slashing those zombies while our lovable characters fight to survive.  And so the run of red kinda reminded me of that which is why I chose to create a Walking Dead ornament with this one.

The file that I used for this ornament is one that was shared in one of my Facebook groups, and is a personal use only file.  It's the second Walking Dead ornament I've made and in case you missed it, you can view my first one here.  That particular ornament featured Rick and Carl so of course this time I had to feature Daryl.  

What do you think?  Perfect gift for a Walking Dead fan?  

Skelegro Potion Bottle

The Skelegro potion is an awful tasting potion that caused lost/vanished bones to regrow in a slow and painful process.  So goes the story in the Harry Potter world.

It's been a while since I've created a Harry Potter project, but when I found these awesome skeleton bottles in the Halloween décor at Michaels I knew exactly what to do.  They're great bottles made from a polyresin and measures approximately 9 inches in height.  And while it's not the exact design of the original Skelegro bottle it's probably as close as I'll get.  At least for a bottle that I can buy and alter myself.

Once home with my new potion bottle I turned to our friend Google search (actually I use Bing) and began searching for the Skelegro label.   There were quite a few out there and I had to look at pictures I took of the Potions for All Afflictions shop in the Wizarding World at Harry Potter to make sure I chose the right one.  You see this is where I could be even more authentic in my recreation of the potion bottle.

After finding the accurate label I opened the picture in my Silhouette software, traced and created the cut file I needed.  Now the trick was to cut those silly words out in the size I needed and not lose any of them in the weeding process.  After all the space I had to work with for my label was 2 inches wide by 2 1/2 inches tall.

Using my Oracle 651 vinyl, it took two different cuts and a couple play arounds with sizing of each line, but I got it.  And now I have a great, fun new potion bottle to add to my collection.

Cinderella's Slipper

Have you seen the recently released At Midnight file by Marjorie Ann Designs?  If you love all things princess this is a must have addition to your paper piecing stash.

While this particular file has your favorite Cinderella princess, prince charming and fairy godmother, it also includes Cinderella's carriage and glass slipper.  Oh and let's not forget the castle or pumpkin.  With so many great options in this file it was hard to decide which image to play with first.  But as you can see I finally settled on the glass slipper.

Since glass slippers are just that.  Glass.  I decided to use a scrap of vellum I had for the slipper image.  I love the way that it turned out as it gives that sheer image you would expect of a glass slipper.

The sentiment I used for this card is from the Jaded Blossom stamp set titled Enchanted

To finish off my card I decided to add a couple of stream colored skittles from DoubleClick Connections.  There's just something about those skittles that I love and you can bet that I'll use them every chance I get.


Christmas Carolers


I have another quick and easy ornament to share with you today.  I decided that this year I would try using the alcohol ink rather than glitter method for my ornaments.  If you've never used alcohol ink for your ornaments check out the video how to here.  It's so simple that you'll be asking yourself why you didn't try it sooner......at least I did when I saw how easy it was.

When Silhouette was running their Christmas in July store this Carolers Silhouette file by Hero Arts was one of the many files that I purchased.  It's a fun file, easy to cut and absolutely perfect for this alcohol inked ornament.


Little Biker Man

After a couple months of my heat press being "packed up" I was finally able to break it out and play again.  Because it had been so long I was actually nervous about using it.  I had to remind myself about how to cut my heat transfer vinyl and what settings to set my press for.  Something that I used to be able to do without even thinking.

Fortunately I didn't have to think too hard and getting back into the swing of using my heat press was much easier than I anticipated.  Thank goodness too because I've been holding on to this awesome Biker Pack file from Apex Cuttables just waiting to create a little boy's tee with it.  

This amazing file has five different designs and each one of them are just as cute as ever.  I love the way that this particular design pops on this baseball tee.  Those red sleeves and this great little biker go so well together don't you think?  

I love this one so much that I need to go buy a few more tees so I can cut the other designs and create a complete line of little boy biker tees.

Rock Painting

So I thought I'd try something new - again.  Over the past few months I've noticed a growing trend in painting rocks.  First it was just in my FB group Universal Studios Annual Passholders.  But then one of my friends started sharing pictures almost daily. 

And then my son and I each found a rock.  Well that meant I had to join some group on FB so that I could post pictures letting the painter know that we found them.

Being in that group meant that I had to start checking out pictures on Pintrest.  That lead to my husband and I both being on the lookout for rocks that I could paint.

Are you seeing how this all "snowballed"?  😀


Seriously though.  I just decided one day to start playing around and paint a couple of rocks to see how I'd like it.  Of course they looked like a child painted them.  After all I am not a painter.  But I still hid them and started painting my next set.  To this day I don't know if those first ones were ever found.  All I can do is imagine someone without a computer or FB did find them and are enjoying them somewhere.

Since my first attempt at painting rocks I've bought new brushes and paints.  I hear some people use markers and sharpies but if I'm going to paint a rock I'd rather just 'paint' it.  I've improved a little but really it's about having fun.  It's been a great new outlet just sitting there thinking about nothing but painting that silly rock that someone will hopefully enjoy.

How about you?  Have you tried painting and hiding rocks yet? 


Jurassic Layout

Today I have a layout to share with you.  I still have so many pictures from out trip to Universal Studios that need to be scrapbooked.  And yes, that's after I've already filled up one book.  I guess that's what happens when you visit your favorite place every year.

This layout features pictures that my husband and I took when we visited the Jurassic Park section of Universal Studios.  Tucked in between Camp Jurassic and the Discovery Center is an area where you can meet a 9 foot tall raptor.  It's a fun non-ride experience and we do it every time we go.

So for my layout I thought it would be fun to use pieces from the Dinosaur Park file by Marjorie Ann Designs.  Mix in some fun dinosaur background paper from the DCWV Kidosaurus Stack and you have a winning layout.

It's a Chicken Thing

Chickens and kitchens are a pairing that I've seen around off and on for a long time.  So when I ran across this Hei Hei inspired embroidery sketch from Thanks for the Adventure I had to add it to my stash.

Lately I've been stitching out towels for Christmas.  And those towels have been stitched on a waffle weave style towel.  Well this time I decided to do it all completely different.  This time I stitched out my rooster on a flour sack towel.

Now I'm not sure how I feel about these flour sack towels, but there are people out there who just love them.  Or so I'm told.  😀  So I figured why not.

All in all I do love the way that he stitched out.  The colors of thread I used are not 100% accurate but I used the closest colors I had.  But then isn't that what "inspired" is all about?  Taking the real thing and creating something based on it?  Either way I'm loving how the colors I used pop against each other on that white background.  And maybe next time I'll come up with some clever saying I can add to the design....


Snowballs in August?

I thought I'd venture out and try something new again.  I mean, why not?  Especially since I've toyed with trying this for some time now. 

Several years ago when I bought my first embroidery machine I came across a pattern for creating Snowman Snowballs.  The Embroidery Garden is the company that sells them and I first heard about them when I purchased a copy of Designs in Machine Embroidery back in December of 2012.  In that magazine was an article that featured a Nativity Flameless Tealight Cover set.

Since then I've often visited her website, looking at her various patterns but always too afraid to try them.  Until now........

Armed with some white fleece, the Snowman Snowballs Set 2, a sewing and embroidery machine I set off to stitch out a couple of these snowballs that have haunted me for so long.  And now that I've completed these three I'm left scratching my head wondering why I was so afraid give them a try.

They're definitely a bit larger than I expected but that's okay.  Now I just need to decide if I want to make little hats for their heads or just leave them as they are.  I'm thinking I'll leave most of them as they are and when I get more made I'll look for a bucket that I can package some of them with and then just sell others individually.  In a town where we never see snow these are bound to be a hit. 😉


It's a Hero Thing

I love it when I can combine my love for papercrafting along with my love for embroidery.  Today's project is just such a combination.

A while back I added the Little Heroes file from Marjorie Ann Designs to my stash.  And over the course of a month I created three other such card and burp cloth sets featuring Superman, Batman and Captain America.  But today, I get to share a set featuring the Hulk.

The stamp set I used for this card is from the Jaded Blossom stamp set titled Super Hero (same set as the revamped, but before it was 'revamped').

For the burp cloth, I used the recently released Hulk applique from Stinkin Cute Applique.  He was absolutely fun and easy to stitch together and I tell ya her designs just keep getting better and better.

Since my other heroes were stitched on a cloud print flannel I decided to stitch my Hulk on the same print.  It's a flannel print that I found at Hobby Lobby and is appropriately called cloud print. I think this is one of my favorite flannels that I have found for use with my burp cloths.

And there you have it.  Another collision of two of my favorite crafts.

Peter Pan Burp Cloth

I'm not gonna lie.  I love Peter Pan.  Not that I'm a fanatic about the cartoon, but I love the story and characters.  And so whenever I get a chance to create a craft that features Peter Pan or one of his companions I jump at it.

(Did you see the lantern or night lights I made last year?)

Today I have another burp cloth that I've made and this time it features the delightfully fun Peter Pan himself.  The Peter Pan sketch is another inspirational design created by Thanks for the Adventure.  Just like all the other designs I've stitched out he stitched beautifully.

Now I just need to decide what I want to stitch on the remaining 10 or so cloths that I need to finish....


Tiana Sketch Baby Dress

It's been a while since I've embroidered on an article of clothing.  I'm still not that comfortable with it as I have difficulty placing clothes on my hoop.  But when it comes to doing these little baby dresses it's not so bad since I can just place the stitching at the bottom of the dress.

And so today I share with you the last of the baby dresses I have on hand.  I had purchased several of these cap sleeve dresses in different sizes, and colors, from Hobby Lobby.   The smaller ones up to about 6 or 9 months were perfect, but I discovered that the one year dresses had an issue with the opening for the head.  I had one I made for my granddaughter that I could not get to fit over her head.  To remedy that I had to cut a slit and create a button hole.  Needless to say, I reached out to corporate about the issue and they said they'd look into it.  Either way I won't be buying anymore of the larger sized dresses.  Too risky.  The shirts they sell though have been wonderful and I will be working with more of those in the near future.

For this dress I found this great sketch of Tiana over at Thanks for the Adventure.  Since I had just made a greeting card with Tiana I thought I'd make a little dress too.  I have always loved how beautifully these sketches stitch out and this one was no exception.

Princess Tiana - You're Awesome

Today I'd like to introduce you to the latest princess in my Princess themed card collection.  This beautiful princess file is from Marjorie Ann Designs and is titled A Princess and Her Frog.

When I first saw this file I just fell in love with it.  The princess is absolutely gorgeous in her green shimmery gown.  Of course I was out of shimmery paper so I had to create my own shimmer by using my white gel pin to add some accents of white pops.

But oh, up against that background paper I found in my Once Upon a Time stack by DCWV I think she pops even better.  The picture doesn't really do my card much justice but if you could see it in real life you'd be able to see all the shimmer of the lily pads on the background paper.  I mean, really how perfect was it that I found a lily pad print paper for this princess?  

And my stamped sentiment?  Well that's from Jaded Blossom's stamp set titled Super Hero 2.

And with that I am off to enter my card into the following challenge:

Friendship - Cut it Up - Ends August 9th

Thing Two Burp Cloth

Can you believe that today is August 1st?  That means it's just 52 more days until Fall begins and 146 until Christmas.  So for those of you that participate in the craft shows that means our time for getting ready is about over.  My first show for the season is always Oktoberfest and that comes one week after Fall begins.

As you've probably guessed by now I'm trying to fill a different niche this year.  While people love homemade greeting cards and such they don't sell very well in my area.  Since I had played around with embroidery a couple years back my husband decided it was time to give it another whirl, and so he bought me a new machine.

I'm not quite ready for embroidering clothes yet.  Goodness knows I've tried.  Some have turned out and others have failed.  Either way I'll continue to try as I grow and learn.  For now though I'm enjoying other projects - like baby burp cloths.

When my children were little I quickly realized I could never have enough burp cloths, and the same rang true with my granddaughter.  It was this aha moment that prompted me to find a nice sewing pattern that I could use for making my own cloths rather than using diapers or other style blanks.  I wanted something unique and all my own.  
Now that I've told you my story, I share with you another burp cloth I've created.  As with all my burp cloths I use a pattern I found from Simplicity, pattern 2924.  It has a lot of great baby accessories and perhaps I need to begin making some of them too.

I loved the way that my Thing One burp cloth turned out last week so I decided to use the same flannel fabric for Thing Two.  It's a nursery flannel with Grey Baby Words that I purchased from Joann's.  In between my flannel is a cotton batting that is perfect for that extra absorbency.

The Thing Two applique is from Stinkin Cute Applique.  It's a relatively new shop on Etsy that has some really cute designs.  I've stitched out several of them now and they just keep getting better and better.  So if you like to do embroidery you should really check out their shop.

Nightmare Book Pillow


I thought I'd do something a bit different today.  Instead of starting the week by sharing a greeting card I thought I'd share a new embroidery project.  

So today I'm sharing a new book pillow that I made.  Last year I found this great Nightmare Before Christmas fabric at one of my local craft stores.  And, as I so often do I purchased a yard just because I liked it.  I had no project in mind.  Nothing special at all.  I just wanted it.  

The fabric must have sat in a pile for months before I finally used it.  It wasn't until Halloween last year that I was inspired to create a Halloween tree for my husband.  Halloween is his favorite holiday, and so I made a Nightmare Before Christmas themed tree.  And what tree is complete without a tree skirt?  That's right I used a piece of this fabric to make a tree skirt for his Halloween tree.

Once complete I still had plenty of fabric leftover.  So when I saw this sketch of Sally over at Thanks for the Adventure I knew another book pillow was in order.

The verbiage I added using the Comic Strip font from Applique Corner.

Gingerbread Minnie

Remember last week when I shared the Gingerbread Mickey towel I appliqued? (You can find that post here.)  Well, this week I decided to make his companion, Minnie.

She turned out every bit as cute as the Gingerbread Mickey and I was thrilled to have a complete set.  Until I remembered that I had reduced the size of Mickey because I initially thought about adding some verbiage on the towel with him.  So now I need to go back and recreate another towel with each of the appliques in the appropriate sizes so I can have actual sets that 'match'.


Appliques with Character has both Mickey and Minnie as a set here.  BUT, you can also purchase them separately and save money.  Don't ask me why, and it may just be a special she's running, I don't know.  Either way she has Gingerbread Mickey and Gingerbread Minnie currently in her dollar section.

So if you like embroider these are a great find for making some special Christmas gifts.

Christmas Advent Towel

Hey everyone!  I'm back with another Christmas in July project.  This time it's another kitchen towel.  I found this fun design over at Thanks4The Adventure - where I find so many of my fun designs.  This particular design is called Advent Christmas Tsum Tree.

Right away I am going to admit that I was remiss when I stitched this project.  While my towel turned out looking good it could have looked better.  How you ask?  Well, I forgot to use my WSS (water soluble stabilizer) on top of the towel so that my stitches would not sink.  Personally I like to use Floriani's Wet N Gone but any brand will do really.  (I've used the brand from Joann's with success as well.)

Now I know what you're thinking.....well, if you've followed some of my other posts where I've embroidered towels.  Why would I use WSS on this towel when I've talked about using Heat 'n Gone?  The answer is because this particular towel has an applique for the "base" of the project that would help hold the stitches in place (in my opinion).  And with the Tsum Tsums being a filled stitch I didn't want to have to iron over that much embroidery to remove the topping.

At the end of the day though I suppose it doesn't really matter which stabilizer is used for the topping.  It's really a matter of preference.  Either way though I'm still learning as I go, and trust me when I say there is A LOT to learn.  


Elves Make Christmas Happen

Happy Wednesday everyone.  Today I have an adorable Christmas elf to share with you.  This little cutie is part of the North Pole Buddies files from Treasure Box Designs.

The background on my card is really just a cheat as it's a card blank that I had in my stash.  Sometimes when you need to whip up a card real quick those pre-printed blanks come in real handy.

The sentiment is from the Jaded Blossom stamp set titled Elf Workshop.  This stamp set and the Elf Report Card are two sets that you just cannot go wrong with when it comes to anything Elf and Christmas related.

For the finishing touch I opted to use a yellow skittle on the end of my elf's hat instead of the paper jingle bell.  Skittles is one of my favorite card embellishments, and you can find them at DoubleClick Connections.

 And now I'm off to enter my card in the following challenges:

Christmas in July - Cut it Up Challenges - Ends July 26th

Any Holiday - Hiding in My Craft Room - Ends July 28th

Thing One Burp Cloth

While searching through some of my favorite Etsy shops this past weekend I found this great new design that was released by Stinkin Cute Applique.  I've always been a huge Dr. Seuss fan so when I saw this Thing One inspired applique I had to have it.

For my first use I had to create a burp cloth.  I pulled out one of the pre-cuts I made using this great  nursery print baby flannel I found at Joann's.  I thought this grey and white print would be the perfect background and help the colors from the applique pop.

Once it was all stitched out and together I was not disappointed.  I really love the way that this one turned out and I can't wait to try putting this design on a shirt or some other fun project.  Who knows, maybe I'll find some Dr. Seuss print fabric and make a book pillow.   That could be fun.

Oooooh, the ideas that are swirling in my head......

Too Sassy For You

I'm excited to share today's card with you.  Not because it's more special than any other I've created but because this one was really fun to piece together.  As soon as I saw this Cruella inspired character I knew I wanted to create something with her.

This fun little villain is from the Queen of Mean file from Marjorie Ann Designs.  You won't find this file anywhere else as it is exclusive to Marjorie.  When you purchase this file and start to piece Cruella together I will warn you that her hair was a brief challenge.  It took me a minute to realize that the hair is adhered with the top actually to the side of the head this time.  Once I got past that the rest of the piecing was a breeze.

The sentiment for my card is from the Jaded Blossom stamp set titled Sassy Pants.

To finish off my card I added a couple of Stream colored skittles from DoubleClick Connections.

Seek Him


Today I have a quick and easy Christmas ornament to share with you.  I really love the look that you can get using alcohol inks instead of glitter in the glass ornaments.

All you need to get started is a glass ornament, alcohol ink and a can of compressed air.  If you've never done this before you can check out the video by Tim Holtz and Ranger Ink here.

After I inked my ornament I started looking through various Christmas files in the Silhouette Design store until I came across some that I liked.  Great thing about that is that right now until the end of the month they're having a Christmas in July sale.  And for the first time ever it even discounted files that I wanted to use commercially.  😁

The file I used for this ornament is by Kolette Hall and is titled Seek Him with Wise Men Phrase.

Gingerbread Mickey

It's another Christmas in July project and today it's another Christmas towel I've embroidered.  Well, okay this time the towel is appliqued.

I first saw this cute Gingerbread Mickey when I was going through Pintrest.  Of course I had to save the pin so that I wouldn't forget to go back later and find the file.  However, when I did the file was available with someone who wanted more than what I ended up purchasing it for.

Appliques with Character has the Gingerbread Mickey along with Minnie and a lot of other great designs.  I purchased it from her for next to nothing.  He's a great design and stitched out wonderfully.  

I was tempted to add some verbiage to the towel but opted not to for the first stitching.  I thought something like Christmas calories never count would be cute.  Maybe I'll try that the next go round.

Santa, I Know Him

It's time for a Christmas in July project.  Today I'm sharing a Christmas towel and matching ornament that I created.  I found these great waffle weave towels on Amazon for a great price so I decided to purchase a pack to play around with.

For this towel I used the North Pole Santa's Elf sketch from Thanks4theAdventure.  Out of the various companies I've seen offering sketches, Aimee's is by far the best.  I love that her designs look finished and stand out no matter what you're embroidering them on.

When I stitched out my towel I did something different than what I hear others do.  In the different groups I'm in I hear the ladies talk about using a water soluble stabilizer on top of their towels.  But, in a stabilizer class I took the instructor talked about how WSS washes away and after a while the stitches start to drop.   She then went on to say that using a heat removable topping like Floriani's Heat 'n Gone eliminates that issue.  So I've started using Heat 'n Gone on top of my towels.

For my ornament, I did a google search for the ninny muggings quote, found one I liked and traced the image.  While that was cutting, I added a couple drops of green, red and yellow alcohol inks in the ornament and sprayed a couple puffs of compressed air to swirl them around.  I've only made a couple of ornaments like this but they're pretty fun.  Especially since no two are alike.

Belle and Beast Reading Pillow

I thought I would try something new and create a reading (or book) pillow.  I've seen a few of these floating around in one of my Facebook groups and they're pretty awesome.  Especially if you love to read.

There are a couple different blogs I visited that have directions on how to make these.  The Polkadot Chair shared directions for an 18" square pillow. And She's Kinda Crafty shared directions for a 16" square pillow.  Since I'd never made these before I opted to start with the 16" pillow.

This was a good week to try this project too because Joann's has fabric and pillow forms on sale.  I really had no idea what fabrics I would use for my pillows.  I mean, I knew I wanted to make at least one with Harry Potter fabric and I did find some.  But I also found the very last yard available of this gorgeous Beauty and the Beast stained glass fabric.  

Once home it was time to decide what sketch I wanted to embroider on the pocket fabric.  After looking at my options I settled on a sketch of Belle and Beast Reading from Thanks4theAdventure.  The quote is one that I liked so I stitched it out using the Elias font from Applique Corner.  Sadly I did something wrong with my hooping/stabilizer because when the quoted stitched out my fabric puckered.

Overall though I love how this reading pillow turned out.  So much so that I'm thinking after I make my other 16" pillow I'll give the 18" one a try and since it's a larger pillow I'll make the study pillow covers for that one.


BFFs for Life

I have a fun 'teen' card I'd like to share with you today.  Well, I guess it's not really a 'teen' card if you think about the fact that so many adults are right there too. Where you say?  With phone in hand, texting, tweeting, Facebooking, etc.

When I saw this recently released Social Media Kids file from Marjorie Ann Designs I knew it was going to be a fun one.  As always, she did not disappoint.  The file includes several emojis, phrases,  word balloons, and characters.  

For my card, I chose one of the girls and word balloons, which I changed into different sizes for stamping.  Inside the word balloons I stamped words or phrases using the following stamp sets:
And there you have it, a fun card perfect for giving to any friend.