Showing posts with label Harry Potter. Show all posts

Skelegro Potion Bottle

The Skelegro potion is an awful tasting potion that caused lost/vanished bones to regrow in a slow and painful process.  So goes the story in the Harry Potter world.

It's been a while since I've created a Harry Potter project, but when I found these awesome skeleton bottles in the Halloween décor at Michaels I knew exactly what to do.  They're great bottles made from a polyresin and measures approximately 9 inches in height.  And while it's not the exact design of the original Skelegro bottle it's probably as close as I'll get.  At least for a bottle that I can buy and alter myself.

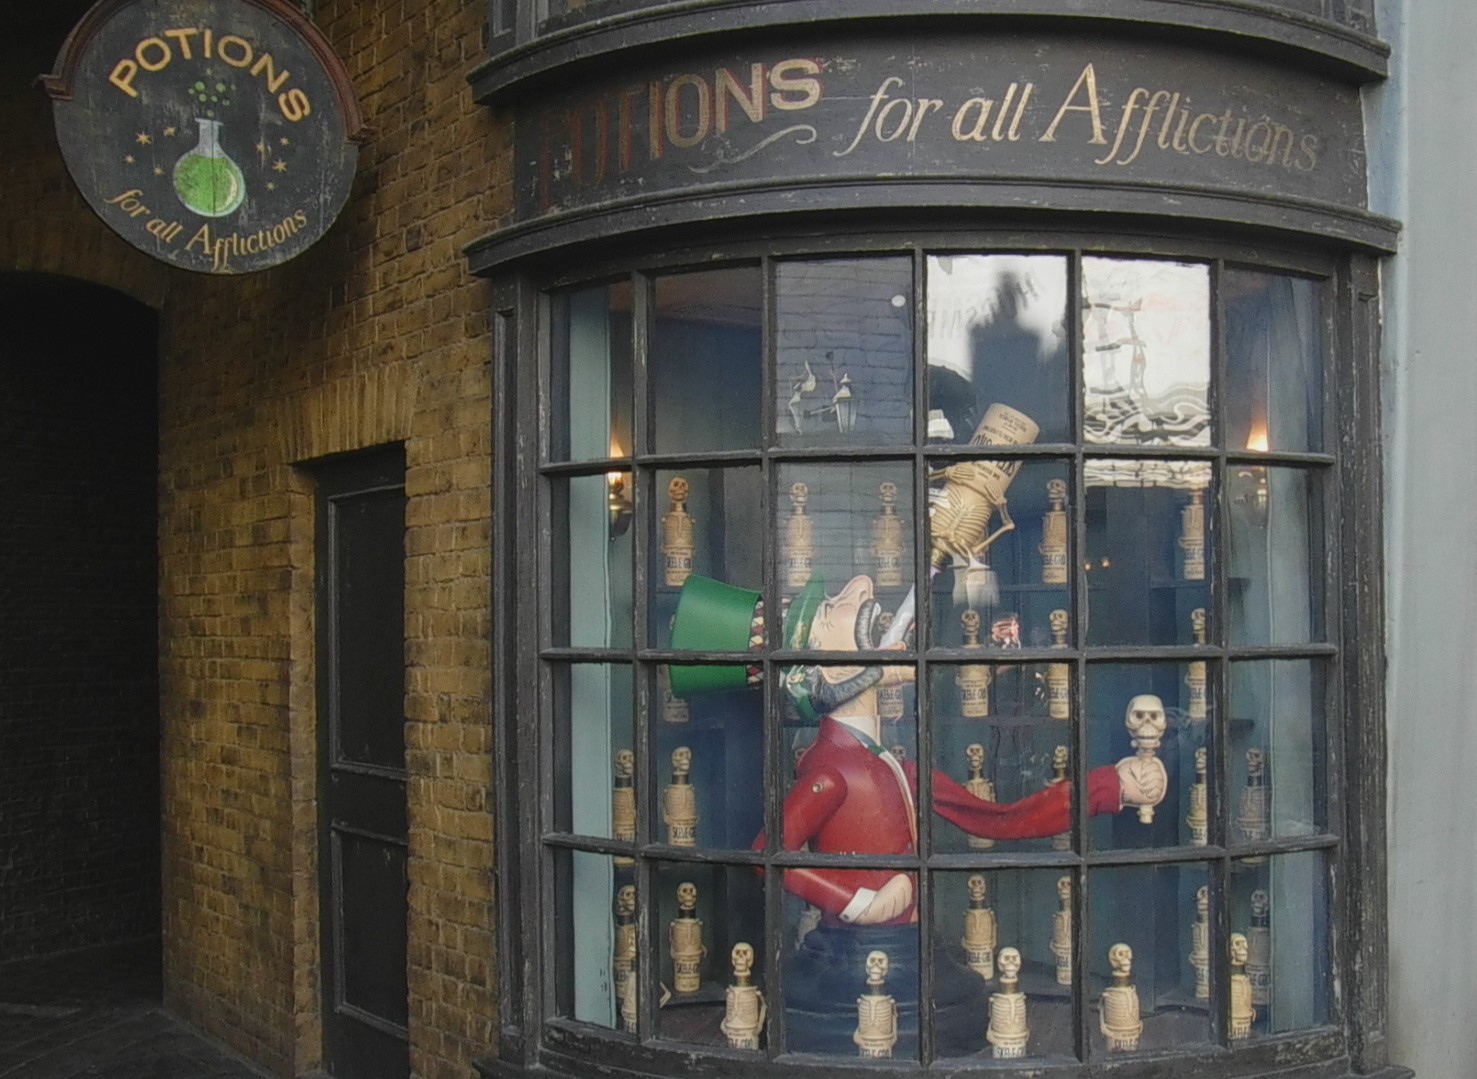
Once home with my new potion bottle I turned to our friend Google search (actually I use Bing) and began searching for the Skelegro label.   There were quite a few out there and I had to look at pictures I took of the Potions for All Afflictions shop in the Wizarding World at Harry Potter to make sure I chose the right one.  You see this is where I could be even more authentic in my recreation of the potion bottle.

After finding the accurate label I opened the picture in my Silhouette software, traced and created the cut file I needed.  Now the trick was to cut those silly words out in the size I needed and not lose any of them in the weeding process.  After all the space I had to work with for my label was 2 inches wide by 2 1/2 inches tall.

Using my Oracle 651 vinyl, it took two different cuts and a couple play arounds with sizing of each line, but I got it.  And now I have a great, fun new potion bottle to add to my collection.

Dementor Soap

Today's project is a quick, easy, fun one that has absolutely nothing to do with the crafts that I typically create.  A while back I purchased a copy of The Unofficial Guide to Crafting the World of Harry Potter.  The reason for this was because I wanted to see how they made their wands, but then I found some other cool ideas that I wanted to try.   One of them was Dementor Soap.  

After reading how they made theirs and being taken back to the days when I homeschooled the older children, I quickly remembered using glycerin soap base when we made soap.  (We were using the Prairie Primer as our unit study and we used to make all sorts of fun things.)  So off to Hobby Lobby I went in search of the tools I would need for making my Dementor soap.

I picked up the rectangular mold, glycerin base and a rain liquid soap fragrance to add to the soap.  I scoured the aisle trying to find something that could be used for packaging and was sad that there was none to be found.

Once I arrived back home I pulled out some scraps of black fabric and cut out shapes in the form of a Dementor.  Following the directions for melting down the glycerin I added my scent and then poured a small amount into the molds.  I then set my Dementor in place and continued to fill the mold with soap.

When the soap was set I removed it from the molds and wrapped in saran wrap to protect it from the elements.  I really have to find a better way to package the soap but for my first attempt in some time I figured it would work.

Now I need to find other play "pretties" that I can add for variations on the Harry Potter theme.  You know like mini snakes for house Slytherin.  I think this could be really fun.  Especially for a Harry Potter fan themed bathroom.....

Potion Bottles

My husband and I have started scouring the antique stores in search of items that will compliment our Harry Potter collection.  Thus far we've found a courting candle and snuffer, a set of 1880's French Pathologie books, a set of eyeglasses (not sure of the time period), skeleton keys, apothecary bottles, and a 19th century ebonised scale.  

Today I'm sharing with you, three apothecary bottles we found that I turned into potion bottles for my collection.  The large bottle on the left has a glass lid which we fell in love with.  It's the first one we saw like that that was not a perfume bottle.  The store had a couple of them but I purchased only this one and now I wish I'd grabbed another one or two.  A different store had the other two. 

The small snuff jar was missing it's lid as were all the snuff jars we saw.  Fortunately the craft stores sell an assortment of corks.  After finding the right sized cork I used my distress inks and inked the cork then gently roughed it up by rubbing it across some pavers.

The bottle on the right had a cork top that was cut up so I got the idea to alter it by adding hot glue around the neck of the bottle.  Then I thought about adding a bead to the top and searched through my drawers until I found this last flat bottomed one in my stash.  After the hot glue dried I painted the glue and bead in a chocolate brown metallic color.

The labels are ones that I found doing a google search.  I wadded them up and then brushed across them with my distressed ink.  I then ran them through my Xyron creative station and adhered them to the bottles.  After that I added twine to the large bottle along with one of the Tim Holtz Crossbones adornments.  On the Amortentia potion I added a flat backed heart I found during Valentines.

Now I need to find a small cauldron, beakers, test tubes and other odds and ends to complete my collection.

Flying Keys

While we were in Alabama last week, my husband and I took a trip to Hanna Antiques, one of the antique flea malls in the area.  Not having been there before, we were quickly amazed at the items they had and decided it could be a dangerous place to shop.  However, we behaved ourselves since we were looking for specific things that we could use as 'fillers' in our Harry Potter collection.

For example, we came across several booths that had antique spectacles so we picked up a pair of those.  We also found a couple of skeleton keys which we quickly snatched, along with a candle snuffer to go with a courting candle we found at a different venue.


After arriving home from Alabama, I searched the Silhouette store looking for some wings that I thought would work for flying keys.  I found two files that I liked.  The first was a set of fairy wings. The second was actually a butterfly that I cut the wings from using the cutting tool in Silhouette.

I cut the wings from vellum and attached them to my keys using hot glue.  I then curled the wings a bit so that they weren't so flat and lifeless.


Since these keys are the real deal and not the 'decorative' type they're heavier.  So instead of trying to hang them from the ceiling I'm just going to place them on a shelf in my curio cabinet.

Harry Potter Craft Room

 
You've heard me talk about it, and you've seen sneak peeks.  Today I'm going to take you on a tour of my new craft room.  When I started the remodeling in this room it was still my son's bedroom.  But since he's in process of moving out I talked to him about wanting to start on the painting and he was okay with it.  In the room was a white accent wall that I thought would be perfect for transforming into a brick wall. 
 

After researching several techniques on how to do this my husband sat down with me one evening to help with the taping off for the 'grout' lines.  Once that was complete I used a Cello sponge and a can of brick red paint and began my faux brick painting.  After allowing the paint to cure for 24 hours I came back with another shade of red in the pallet and lightly sponged on each brick to add color/depth.  This same process was used to paint the wall on the outside of my room.
 
 
I recently purchased a china cabinet for next to nothing and turned it into my fabric cabinet.  Each fabric swatch is folded and wrapped around a comic book board and filed in the cabinet.  Because this cabinet would not fit into my craft room it sits on the wall in the hall just outside my room.
 
 
Last week I shared with you the owl lamp and Diagon Alley 'sign' that are just outside the doorway.  If you missed that post you can find it here.
 
 
As you enter the room you see the wall where I have my crafting tables set up.  To the right of the window I have hung the pictures I created using alcohol ink and vinyl.  The post on how I created these can be found here
 
To the left of the window is my wand holder.  I love the way that this turned out.   Especially because it was made in such a way that it can be added to.  This was a fun project to create and you can read that post here.
 
 
Turning to the next wall you see my sewing space.  To each side of my sewing table are a set of drawers on which I have used vinyl to create labels identifying what is inside.  Below the table is a garbage can I vinyl'd using a file I created from a picture I found doing a google search.  To the right of the table is my cage of Cornish pixies.  (Eventually I will fill in that dead space on the wall.  😀 )
 

On the next wall is my curio cabinet that holds my still growing collection of horcruxes and other collectibles.  On top of the cabinet is my potion bottle display.  This too is a work in progress as I will be adding other items to this display. 
 
 
The post for how I created the bottles and potion book can be found here and here.  Eventually I'll be adding another death eater mask to this wall. 
 
In the meantime though, I wanted to include a trail of spiders (Why can't it be follow the butterflies?) so I found a set of spiders in the Silhouette Design Store and used them to create my trail.  I cut the spiders from vinyl and adhered them to the wall and trim.  My Lumos Nox plate cover is one I created a while back after being inspired by others I found on FB.
 
 
On the last wall I have more of my storage drawers and shelves.  Here I was able to use a bit of space to display my Cornish pixies light, Savings Managed bank, and owl.  The owl is a bank that I found on clearance at Michael's.  It was solid white but I wanted to give it a bit more life and so I altered it. 
 
 
I used some gray paint and lightly edged under the 'feathers' and painted the beak.  Using vinyl I colored his eyes and gave him glasses.  The scarf was crocheted by my baby sister since her crochet skills are far better than mine.
 
And there you have it.  My new happy space!!

Owl Lamp

My new craft room is now complete, but before I share how I transformed my room I thought I'd share the lantern I made to hang outside the doorway.  My room sits at the end of a small hallway and since it's a Harry Potter themed room I thought why not faux brick the wall outside as well as the inside accent wall.  (More on how I did this later.)
 
After I was finished with the brick I wanted a sign.  Only problem with that is that the clearance above the door was only 5" - much too short for a good sign.  And since the doorway is the size of the hall, it too did not provide much space on either side of the door.
 
Finally, it hit me - why not add a lantern?  After all I had one in reserves.  Using this cute file I found in one of my FB groups my I created my lantern.  Even after hanging the lantern on the wall I still wanted a sign.  Then it hit me.  Why not make the sign from vinyl?
 
Again using a file I found in one of my FB groups I created my sign.  However, I had to flip the main part of the sign so that the hand would point towards the door to my craft room.  After that it was just layering the remaining pieces together.
 
And now the entrance to my craft room is complete.

Ollivanders Wand Holder

I made the move into my new craft room this weekend and what a whirlwind of a move it was.  And now that the move is complete I can begin the decorating.  However, it won't be complete for a couple of weeks as I wait for things I've ordered to come in, or have the time to finish making the items I need for my décor.
 
Today I want to share with you one of the items that I just completed (with hubby's help).  For the past couple of days I've been working on creating a wand holder for some of the wands we've started collecting.  What I love about this one is that I can still add another one or two plaques to it as we collect more.
 
To make this holder, I started with some pine "innkeeper" plaques I found at Michaels.  These are 9" x 19" and perfect for the wands.  I stained this with some leftover oak stain that I had on hand.  After that dried I came back and dry brushed around the top outer edge with a dark brown paint.
 
The Ollivander's logo was from a file that was shared in one of my FB groups.  The verbiage for the wand descriptions were done using the Modern Fraktur font.  The wand owner's names were done using the Vinque font.  Both from dafont dot com.  I cut the logo and verbiage out of Oracle 651 vinyl and adhered it directly to my plaques.  I then sealed each plaque with a clear laquer spray paint.
 
After the plaques were dry my wonderful husband drilled out the spots for placing the brackets and plaque hangers.  For the wand brackets we used 3/4" brass shoulder hooks which we purchased from Lowes.  As we decided our placement for the brackets we decided to go outside the box and place them so that our wands would have a little slant here and there instead of being perfectly straight across.

Owl Post

Today I'm sharing a fun, magical card with you.  I made this one using the Harry Potter file from Treasure Box Designs.
 
My background was made using scraps of my 9 3/4 print papers that I found in my stash.  The grey paper I distressed using my Tim Holtz paper distresser.
 
Then using stamps from the My Favorite Wizard stamp set by Jaded Blossom, I stamped my sentiment and added a little lightning bolt to my owl.  I also used this same stamp set for the inside of my card.


And now I'm off to enter my card into the following challenge:
 
Hiding in My Craft Room - Masculine - Ends May 27th

Magical Theory and Potions

 
I sat down on Sunday and played around with making another floating book 'shelf' for my craft room and added a couple of extra potion bottles as well.  This time instead of just painting the bottles (this time purchased from Michaels so I'd have a bit of variety in style) I wanted to fill them with potions.  I wasn't entirely sure what I was going to do but I did know that I wanted one of them to be Gillyweed.

After searching around on Pintrest I found a great idea for using a product called Enviro Tex Lite.  You mix it up, pour it into your bottles and it sets us to be a solid product so there's no risk of spills or ick.  For my Gillyweed I put a piece of a plastic plant into my bottle.  Since I didn't have tiny pebbles I tried using skittles but as the resin mix did its thing my skittles lost their color and blended in.  The Veritaserum bottle was created using more of the EnviroTex Lite mixed with a couple different colors of food coloring.  I'd add one color, swirl, let sit for a moment then add the next color and repeat.  If you look closely the resin mix set up so that it appears there is potion mix running down the bottle.  Finally, my Mandrake Root potion is filled with a bit of Spanish Moss.
 
As for my book, it's a paper mache book box that I found at Hobby Lobby.  Online they only sell it in a set but in the store I found the books individually.  In my first post on making these I provided a link to the video that explains how to make these.  Below is a condensed step by step version.
 
1.  For the book title, hand write the name and then using a hot glue gun trace over what you have written.


2.  Along the inside of the book where the pages are you will need to fill in that space with some type of wood.  I opted for balsa wood because it's thin and easy to work with.  The type I purchased gave an almost perfect size for the medium box I purchased and required 6 sheets.


3.  Using a dark brown paint as you base, paint two coats of paint on the outside AND inside of your box.

4.  After the brown paint is dry, using a white and another color of your choosing (I used a metallic red) dry brush over the brown to add some color.


5.  Finally, apply a sealer to the inside and outside of your box.  I believe in the video she used a mod podge; however I opted for using a laquer spray sealant.

This is such a fun and easy project that's perfect for any Harry Potter fan to create.

Floating Wall Shelf

Today I'm sharing another fun project I created for my new craft room.  Right now it doesn't look like much but once I decorate my room it's going to be a wall shelf.
I first came across this idea in one of my Facebook groups when another member was sharing how she decked out her bathroom in a Harry Potter theme.  So many members loved her floating shelves and wanted to know how they were made so a short video was created and shared here.
 
In a nutshell, you start out with a paper mache book which can be found at Michaels or Hobby Lobby.  The ones at Michaels are a bit fancier like the one used in the video but since I was at Hobby Lobby for other items that's where I purchased mine.  After handwriting the name of my book on the spine I traced back over it with hot glue.  I even added a couple of skeleton buttons that I had in my stash for a little extra effect.
 
On the 'inside' of the book where the pages are located you will need to glue a strip of thin wood like balsa wood so that it fills in the gap between the pages and the outer edge.  This is where you are going to insert the nails or screws for hanging your book to the wall.
 
As the glue dried I gathered my paints.  I used a burnt umber for the base coat, covering the entire box inside and out.  After the first coat dried, a second one was applied.  After the second coat dried, I came back and dry brushed over the outside of the box with a white paint.  I then used a bright red metallic paint for a second dry brush to help mute the white.  Once the paint was dry I sealed the box with a spray laquer I had on hand, but mod podge or another sealant can also be used.
 
Pretty neat huh?  Now I just need to make a couple more.


Slytherin's Secret Potions


Since I didn't babysit my granddaughter last night I had some extra time to play in my craft room last night.  So  I took the opportunity to begin making the first of what will be many items to come for my new craft room.  You see, my two youngest boys are in process of moving out of the house and that means a free, larger room that I can take over for my craft room.  And with that means a new décor - Harry Potter themed of course.  😀
 
This project was inspired by one I saw at Over the Big Moon.  There were two posts that together made for a great potions set.  One offered free potion labels to print (which is where a couple of mine came from - others I found doing searches for them specifically), and the other was for the potions book.  Using her inspiration, here's how I created my project......
 

For the potions book, I used book I purchased from the Dollar Tree.  That way I wouldn't feel bad about cutting it up.  Measuring the cover, I cut an opening in the center of the cover using an Exacto knife.  I then used the knife to scrape around the edges of the opening to rough it up a bit.  I also sanded over the cover (front and back) to rough it up and to remove the indention of the book title from the spine.  Once satisfied with the roughness, I mixed together Ivy Green and White craft paints and with a sponge painted over the cover. 
 
While the paint dried I found a picture of Professor Snapes, printed it and then laminated it.  This would later be taped to the inside cover of the book.  I cut the book title out in vinyl and applied.  No one really knows the "exact" date that Hogwarts was founded but what everyone does seem to agree on is that it was "around" 990 AD. Some use that date and others I've seen using 993 - so I went with 993 for my book date.
 
The potion bottles were various apothecary bottles I picked up at Hobby Lobby - although you could use bottles from around the home.  Before I painted my bottles I tried roughing them up using sandpaper.  However, that wasn't working too well so I decided to try dragging them gently across my brick pavers which worked beautifully. 
 
After roughing up the bottles I painted them with different mediums.  The blue and white bottles were painted with Tim Holtz Distress Crackle Paint.  I also used a clear crackle paint on my Dragon's Blood bottle and then used red alcohol ink on the inside.  The brown bottle I painted using a dark brown paint mixed with a dab of water.  After applying the paint I immediately began wiping it away with a paper towel.  Once dried I came back with a gray paint (didn't have black on hand) and splatter it haphazardly around the bottle.  For my Floo Powder jar I used Krylon Glitter Blast spray paint in Diamond Dust.
 
After printing and cutting out my labels I distressed the edges with my Tim Holtz paper distresser.  I then wrinkled each one up and inked over them with Tea dye Distress Ink (Dragon's Blood I did with Fired Brick).  I then ran the labels through my Xyron and applied them to the bottles.  I then sprayed the bottles with a laquer spray paint to seal.
 
Right now only two of the bottles have "ingredients".  The Floo Powder I filled with a glow in the dark glitter and for the slug repellent I used a mixture of purple/silver glitter with a brown flock.  I haven't decided what, if anything, I'll use in my other bottles.  Since they are not as transparent I may just leave them as they are. 

Mischief Managed Luggage Tag

For my final project this week I'm back to the last of my Universal Studios themed projects.  I saved this one for last because it's the tag that we will have placed on our 'backpack' that we'll have on us while we are in the parks. 
 
Recently Aimee over at Thanks4theAdventure has been on a bit of a roll creating different themed stroller tags.  Even though I don't have children in a stroller I just had to have one (or two) so that I could use them on our backpacks.  So while these were originally created to be approximately 8" x 6" I scaled ours down to more of a 5" x 3.5" tag.
 
 
This particular tag is called the Wizarding World of Harry Potter tag.  It's an in the hoop project, meaning the entire project is made in the embroidery hoop.  The tag itself are different pieces of vinyl that are stitched together through out the project to create the final tag. 
 
I've never stitched on vinyl before so for a first attempt it didn't turn out too bad.  Next time I stitch one of these I'll definitely skip the step for creating the "button holes" for hanging.  Instead I'll just use my eyelet punch and add the grommets.
 
And now I'm off to begin my mischief......

Universal Tip Pockets

Today I'm sharing a small of set of tip pockets I made for use at the hotel we'll be staying during our trip to Universal Studios. 
 
I started with the Tip Pocket file from SVG Cutting Files.  But since we are going to Universal Studios I wanted theme to have characters from some of the different attractions in the parks rather than the icons that come with this file. 
 
For the different characters I used files that were shared in a couple of my FB groups (Cornish pixies and Grinch hand).  I also used the Imagination file from Marjorie Ann Designs for Thing 1 and the Alien Fighters file for the alien.
 
The stamped sentiment is from the stamp set Simply Said from Craftin Desert Divas.

Wizard In Training

I have been counting down the days until our annual trip to Universal Studios, and this week I am in the final stretch.  So in celebration I am going to share a couple of different Harry Potter themed projects with you this week.
 
The first one is a baby burp cloth I embroidered using the recently released Wizard in Training file from Thanks4theAdventure.  I so wanted to embroider a tank top that I could wear but several minutes into the stitching something happened and I was unable to save the top.  So instead I traded out for my creating one of my faithful burp cloths.
 
I really like the way this file works with the chevron print on the flannel I chose.  It's a print that I found at Joann Fabrics called Snuggle Flannel Fabric - Chevron Gray Small.  The print is perfect for a variety of projects and chevron prints are all the rage so for this project it's a definite win - win.

Team Quidditch

Last week I decided to give embroidering on clothes another try.  After the successful turnout of my Boo Sketch I thought I'd be brave and go one step further and try an easy applique.  Only it wasn't that easy.  At least not for me.  I even enlisted the help of my JT Hoop It Up and still had difficulties getting my small shirt in place without shifting on me.
 
It took three attempts to get my shirt set and ready, and as much as I wanted to just give up I refused to do so.  In the end I won out and was able to create this fun Harry Potter Quidditch tee.
 
For this shirt I used the Harry Potter One applique from Appliques with Character.  At first I thought about putting the design on the back of the shirt.  That way it would look like a sports team shirt, but then I thought that since this was for a small child I'd be okay with it on the front.
 
The fabric I used for the applique is one that I found at Joann's and while it was still available in my local store this past weekend I was unable to find it listed on their website.  Instead they have some new designs that I did not see in my local store.  Guess that's how it goes sometimes but I sure do wish they would let you buy it online and ship it to you like they do other fabrics.  Oh well, I guess that just means I'll have to keep my eyes open next time I'm there.

Got Your Nose Tee

Back in February I made my first one of these t-shirts and posted it on my blog here.  When my husband saw how the shirt turned out he was adamant that that was the shirt he wanted me to make him for our upcoming trip to Universal Studios.  We've been going every year for the past four years but this year will be special because it will be just the two of us.  That and it'll be a late anniversary celebration for us as well.
 
The design is one that was shared in one of my Harry Potter Facebook groups.  I've had several people ask if I could share the file with them, and since I am not the creator of the file I am unable to do so.  If you message me though I'll be happy to share the name of the group with you.
 
At first I was worried about applying HTV to the shirt my husband chose because it's a polyester blend and everything I've done has been a cotton blend.  I was honestly scared it would melt or something being pressed under all that heat.  But it pressed beautifully.

 
Because this is a polyester fabric that has some stretch to it I decided to use EasyWeed Stretch vinyl for the design.  I didn't want to take the chance at using regular vinyl and then having the design crack and get icky.  I will say that for me, personally, the stretch vinyl was harder to work with.  I had more issues trying to weed this vinyl than I have had with any other I've used.  I even had a couple of spots where the weeding got messed up and I had to make some quick modifications to correct it.  Fortunately everything turned out okay in the end, and when I showed the shirt to my hubby he couldn't see where any mistakes were made.  Whew!

A Boy and His Owl Burp Cloth

It's been a few days since I've sat down to make a burp cloth and so I thought I'd share one of the new ones I just made with you. 
 
I found this great chevron print flannel over at Joann's and had an inkling that it would make a great backdrop for some burp cloths.  Not really knowing what I'd stitch on them I decided to pick up  a couple yards.  During this same trip to Joann's I decided to really stock up on some flannel since I don't get by there often.  By the time I was done shopping I literally had a cart full of fabric bolts.  You see, I'm addicted to fabric much like I am to my scrapbook paper. 
 
After arriving home with my new fabrics, I quickly set about getting them washed and dried so I could begin cutting what I'd need for the next round of burp cloths.  While waiting for them to launder I sat down to find the files I wanted to use for embroidery. 
 
It didn't take long to decide to stitch this wonderful Harry Potter and Hedwig sketch I found at Thanks 4 the Adventure.  I love the way that this sketch stitched out against the chevron fabric.
 
And there you have it, another burp cloth to add to my collection. 

Niffler and His Diamond

We are just a week away (minus a day) from the release of Fantastic Beasts and Where to Find Them on DVD, and I for one am excited......along with the other who knows how many Harry Potter fans.  So in honor of the upcoming release date I thought I'd play around at making a small t-shirt with one of the creatures that just steals the show (and a great many other things) - the Niffler.
 
These little creatures have a penchant for anything shiny.  Thus his holding onto his diamond treasure. 
 
I made a onesie with this Niffler a couple months ago.  Only then I used a different holographic HTV for the diamond.  That one didn't show up as well since it was on a color other than black.  I was so bummed out by it that I went in search of a better holographic that I was confident would work.
 
And my file?  Well, it's one that was share in one of my Harry Potter FB groups. 
 
Now to wait for Tuesday to get here so we can re-watch this wonderful addition to the Harry Potter collection.

Deathly Hallows Shirt

My husband and I will be celebrating our 15th anniversary this coming Monday and this year we told each other we'd take a belated trip to Universal Studios as our gift to each other.  So as we count down the days until our trip (we put it off to May when the weather is warmer) I have made my first shirt.
 
I don't know how many of you are Harry Potter fans or how many of you may have read the books or at least watched the movies.  Throughout the series Harry comes up three different 'mythical' objects that together are known as the Deathly Hallows - the cloak of invisibility, a wand that cannot be beaten and a stone that is said to bring the dead back to life.
 
So when I saw this file for the Deathly Hallows shared in one of my FB groups I thought it would be a perfect one to use for my shirt.  I thought it would be more difficult to weed than it was and so I was pleasantly surprised with how easy this was to create.
 
Now I just have to wait to be able to wear it.....


Potter Wall Art

 
Off and on for years now I have been looking at alcohol inks but have always been too afraid to give them a try.  That is until now.  Admittedly I'm not even sure why I was too afraid to try them because they were so easy to use.  Not only that but if I didn't like the way the glass looked I could wipe the ink off with rubbing alcohol and start all over again.  Have I lured you in yet?  😉
 
 
In all honesty I wasn't sure what I was getting myself into so I decided that I would buy picture frames from the Dollar Tree.  That way if I didn't like the way things turned out I wouldn't be out much money. 
 
 
After scouring the aisle with all the inks I settled on purchasing the alcohol ink kit.  This way I'd have not only the ink but also the little stamping tool.  The kit also includes some glossy paper you can play with as well as a stamp set.  But since I have other plans I set the paper and stamp set off to the side.
 
 
Before I began this alcohol ink on glass endeavor though I watched a couple of youtube videos.  Just search for alcohol ink on glass.  There are all kinds of videos out there - even some that use fire in the process. 
 
 
At first I was going to try the method using fire so I went outside to the porch, and there I created my masterpieces.  The inks did not take very long to dry but since I was going to place cardstock behind them I let them sit overnight to cure.  After that I chose several files that were shared in my FB groups, cut them from vinyl and then adhered the vinyl to the front of the glass.
 
 
The only exception to this is the center picture which was created using a scanned and printed section from the Tales of the Beedle Bard book.
 
And now I'm off to enter my project into the following challenges:
 
Die Cuttin Divas - Animals - Ends February 26th
 
DL Art - February Linky Challenge - Ends February 28th