Gingerbread Spice

 
It is with great excitement that I announce that the Cardz TV Stamps design teams are back in action.  The fun started last week with the Sketch Design team and the Gallery team.  This week the Anything Goes team steps out with their first challenge - and as you guessed it's anything goes.
 
I haven't had a lot of crafting time this past week.  Or at least not with my papercrafting.  With my first show of the season upon me I spent a lot of time just making final preparations to be ready for the show.  So between that, my "real" job and babysitting my three month old granddaughter, I did find a little time to create a couple things.
 
For today's challenge, I created a Christmas card.  (You can never have too many)  Using the Baking Fun Gingers from Marjorie Ann Designs I did a print 'n cut to create this quick and easy card.  When it comes to the more complex designs I love that this feature is available. 
 
To finish off my card I used the newly released Gingerbread Spice stamp set from Cardz TV Stamps.
 
 
I also used a couple of skittles from DoubleClick Connections.  These are the Stream and Pink Sherbert colors.
 
Now that you've seen my take on the anything goes challenge be sure to check out the other wonderful designs our team has created for you.  Then create your own project, link up and play along with us.  You have until noon, Thursday October 13th play.

Repurposed Necktie Scarf

I thought I'd take a quick break today and share a different kind of project.  Lately I've been addicted to vinyl and have created and shared so many projects.  In the process I've neglected my poor sewing machines and so today I thought I'd pull out a tie from my stash and create another repurposed necktie scarf.
 
A while back I found the idea for these neck tie scarves on Pintrest and while I've pinned several styles I've yet to find a "pattern" for any of the styles other than this basic one.  I think these are pretty cool and I wish that I could pull off any kind of a scarf when it comes to being fashionable, but I can't.  So I just create for those who can.
 
I've made several of these and I still have more ties to go.  At first I was purchasing them from the thrift store, but then my brother-in-law decided to clear his stash of ties and donated many great ones like this to me.

Believe Night Light

Fairies and Unicorns - along with mermaids - seem to be a popular thing these days.  I guess it's because we all love a good fantasy/fairy tale.  When you get down to it it is fun to dream about some enchanting world where things are fun and charming.  Things that just make you happy.
 
So when I saw this fun fairy riding a unicorn in the Silhouette Design Store I knew that I had to use it on one of my night lights.   I adhered the vinyl to the outside of the lampshade and then I added the word believe at the bottom of the light so that it didn't look unfinished.


The light is a touch sensor night light that I found at the Dollar Tree.  And the light is an LED light so it puts off a fair amount of light when it's lit.

Terminus Cutting Board


All right all you Walking Dead fans.  This one is for you.  When I saw this file being shared in one of my FB groups I could not resist.  Of course the file was originally intended for a t-shirt but I thought it would make a funny cutting board and so that's exactly what I did with it.
 
What do you think?

Friday Football

WooHoo!  It's Friday today.  And not only does that mean the end to a grueling work week for most of us, but it also means it's Friday Night High School Football.  I'm sure that most - if not all of you - have just as much football spirit in your town as we do in our little town of Niceville, Florida.
 
Admittedly I haven't been to a game yet this year, but in my defense I've been babysitting a less than three month old grandbaby every Friday night.  But the really good football rival games have yet to occur so I still have time.
 
  
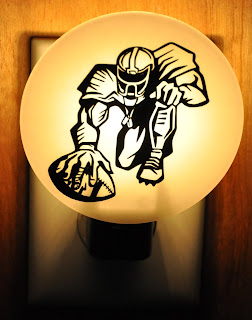
In the meantime, I'd like to share some football night lights that I created using the recently released Football Player file from Cuttable Designs.  When I made these I gave thought to adding the local football team letters but then I realized that our rival teams are really just a stone throw away and since I didn't want to disenfranchise anyone I thought it best to just leave these as they were with the cut out.
 
 
To create my nightlights I used the lights purchased from the Dollar Tree, removed the printed design with some acetone, washed, dried, and applied my own design.  The vinyl used on my nightlights is Oracle 651 glossy.  It's my favorite vinyl and I personally prefer the glossy to matte finish.
 
 
The football player file was a great one to use.  I really needed some more masculine files and this one fit the bill perfectly.  Now if only my boys were younger or actually liked watching football.......not sure where I went wrong on that one.  But hey one daughter out of six kids is better than none at all.  :)

Happy Crafting everyone.

Care Card Holders


As I make the final preparations for my first craft show of the season I wanted to share some care card holders I created.  These will be placed with the cutting boards and various night lights that I have created this year.  Since our booth gets very busy I thought it would be best to set the cards with the product so the customer could grab one rather than one of forgetting to place it in the bag.
 
To make my holders I started with an old cassette case cover.  If you don't have any of these lying around the house and want to try this project you can still find these things at the thrift store.  I bought some a while back for .50 cent each. 
 
To cover the cassette case cut rectangles in the following sizes (cases will vary in size so check your measurements but these were for a standard size/shape case):
 
1 @ 1 1/2" x 4 1/4" 
 
2 @ 2 5/8" x 4 1/8"
 
1 @ 1 1/8" x 4"
 
Then since these were being used for cutting board and light care I decided to use different characters to finish off the cover.  I used one of the Chef Mice from Marjorie Ann Designs Italian Mice file for the cutting boards.  For the lights I used Yoda from the Galaxy Friends file.
 
Repurposed these cassette covers also make great business card holders.  I made some a while back that I use to hold our business cards during the shows as well.  You can check out that post here.

Hello Birthday Girl

I have several birthdays coming up in my family over the next week - my twin sisters and my dad.  So today I'd like to share with you a birthday card that I've created.

For this card I used the Birthday Wishes file from Pretty Paper, Pretty Ribbon.  If you haven't checked out the cut files being offered here you're really missing out.  I've used a few of them and they've all been great and easy to piece together.  This one included.
The stamped sentiment I chose for this card is from the Jaded Blossom stamp set titled Hello Hello.
 
And now I'm off to enter my card into the following challenges:
 
Designer Paper x3 - Hiding in My Craft Room - Ends September 24th
 
PPR Linky Party - Pretty Paper, Pretty Ribbons - Ends October 1st
 
September Linky Party - DL Art - Ends September 30th
 
Birthdays - Die Cuttin Divas - Ends September 25th


You Hoo Witchy Owl

I have a Halloween card that I'd like to share with to start off our week of crafty goodness.  This card features one of the witch owls from an oldie but a goodie file from Marjorie Ann Designs.  The file is called Halloween Hoots, and last year I used several of the cuts from this file.  This year I wanted to finish using the others.
 
When I can I like to use papers that have designs on them rather than piecing a lot of intricate pieces together.  Not that the pieces are bad but I find that for me personally it's quicker and still yields a wonderfully fun design.  So for this card I used patterned paper for the hat and socks, and two different designs for the book.  That's a total of three different patterned papers - which is what's required to join in the fun over at Hiding in My Craft Room this week.
 
I also used a card from a pre-made pack of card forms I had as well some eggplant colored skittles from DoubleClick Connections.
 
To finish off my card I used a sentiment from the You're a Hoot set from Jaded Blossom.
 
Now I'm off to enter my card into the following challenge:
 
Designer Paper x3 - Hiding in My Craft Room - Ends September 24th

Breast Cancer Awareness Night Lights

I was at my new favorite shopping spot yesterday (yep, the Dollar Tree) looking for a couple of things - that I didn't find by the way.  So instead of leaving empty handed I decided to pick up a couple of these touch sensor night light lamps.  I wasn't really sure what I'd put on them but knew I could come up with something.


When I got home I remembered a Pink Ribbon freebie I saw on Apex Cuttables website so I downloaded that and chose to use two of the different designs on my lamps.  After applying the designs I set the lamps to the side and as I kept looking over I'd think about needing to do something with the base so it didn't look unfinished.


At first I thought about the word Hope, but then I thought that while it's an encouraging word it just wasn't the one I wanted.  And then I thought Survivor.  Since I didn't like the way any of the fonts I have on my computer looked I went in search of a font I liked and found this one on dafont dot com.  It's called Ribbon of Hope.
 
And by the way, these little lamps put off more light than you'd think.

Dumbo Inspired Night Lights

 
Today I have a Dumbo inspired night light to share with you.  A lady in one of my Disney FB groups shared this image and I fell in love.  So of course I had to save it.  Using my Silhouette Studio software I traced the image and created a cut file.

I still had some night lights from the Dollar Tree sitting in my stash waiting to be used so I cleaned them up and applied the design to them. 


These will be perfect for a baby's room don't you think?

And now I'm off to enter my night lights into the following challenges:

Die Cuttin Divas - Baby Safety Month - Ends September 18th

DL Art - September Linky Challenge - Ends September 30th

Just Treats Werewolf

I have a fun Halloween card that I'd like to share with you today.  When I saw that Marjorie Ann Designs had released this Happy Howl-O-Ween file I just knew it was one that I had to have.  These little werewolves are just too cute not to be used on some fun Halloween, Over the Hill or similar style project.
 
And because it has been a while since I used my Cricut machine I decided to dust it off and use the print 'n cut feature for this card.  I've always said that I love how the files from Marjorie Ann Designs includes clipart that can be used for times when you're in need of creating a quick 'n easy project.  This little cutie cut up really well too.
 
For the sentiment on my card I used the Frankly Frightful stamp set from Cardz TV Stamps.
 
I also decided to embellish my card a bit by using some orange skittles from DoubleClick Connections.

I'm So Fly Night Light

Happy Wednesday crafty friends.  I had a day of PTO that had to get used before I lost it so yesterday I took the day off from work.  And what better way to spend a day off than sitting in my craft room with no interruptions (everyone else was at work while I played).
 
After months of trying to find these switch operated night lights at the Dollar Tree I finally found them in one of my local stores.  Much to my hubby's chagrin I bought a dozen or so.  But hey, they're only a dollar - right?  And for this obsessed crafter it doesn't get much better - well unless it's free.  LOL 
 
With night lights in hand I tried to decide what I wanted to create with them, and it really didn't take that long to decide.  There were a couple projects I remember seeing in the past and I knew they were ideal for these night lights.  But then another idea struck me.  Lately I've been seeing these "I'm so fly I Neverland" t-shirts.  Well I don't have a heat press - YET - so I can't make shirts but surely I can take that inspiration and turn it into a night light.  And that's just what I did.
 
I took a few pieces from different files for my silhouettes and stars.  The verbiage is just a regular font installed with Microsoft Office called Cooper Black. 
 
Using scraps of vinyl I cut everything to size and then just adhere to night light and viola.  Now we have a fun night light.
 
Now I'm off to enter my night light in the following challenges:
 
DL Art - September Linky Challenge - Ends September 30th
 
Hiding in My Craft Room - Super Scraps Saturday - Ends September 17th

My Patronus Is....

I thought it would be fun to create a couple of jar lights with the "my patronus is" saying.  I'd never really given much thought to what MY patronus is so I decided to take a quiz and this is what it told me........
 
"Your patronus takes the form of a Rabbit. A rabbit is known for being somewhat shy. Similarly, you tend to be quiet around others, especially new people. However, you are very bright and alert. You are good at reading people and know who to trust. You are also nurturing and kind. You may have trouble conjuring your patronus because your mind tends to race in the heat of a battle."
 
 
For my Patronus jars though I decided to use one of the unicorns from the Unicorn Cuttable Design file from Cuttable Designs.  I love how this unicorn is posing in kind of a mid-prance stance.  It has an air of elegance with that flowing tail and yet it says let's be happy and have some fun.
 
 
The sitting mermaid is from the Silhouette Design Store.  I chose her simply because she's one of the mermaids that I had not yet used on one of my jars and I didn't want to duplicate.
 
These are so easy to create using vinyl and frosted glass spray.  Just wipe down the jar with alcohol so the vinyl will stick.  Allow it to dry completely and then adhere your vinyl design and spray with frosted glass.  It's really that easy.


Kitchen Witch


I was looking for some new Halloween files in the Silhouette Design store the other day when I came across this fun Kitchen Witch file.  I was really looking for one to use on my hubby's glass block that's part of a set I'm making but this one caught my eye.  It didn't take long for me to buy it thinking it'd be great for the cutting boards I'm making for the craft fair - or for presents down the road even.
 
For now though I thought I'd give it a whirl and use it for both a square and round cutting board.  I cut one using purple and the other using red.  Personally I think that the red shows through better but the purple is pretty too.  Oh and I did lay the file on the cutting board a bit different than the designer intended.  But that's okay too.
 
 
I gotta tell you, I think I'm getting addicted to the Dollar Tree.  That place has so many great things that you can repurpose. And even better yet, you can buy the stuff for a dollar!  Needless to say I've picked up quite a few things at the various Dollar Trees in my area.  These cutting boards being some of my new stash.  I think my final count for boards is about two dozen.  But now that those are complete it's time to move on to the next project.  There's now two weeks left before my first show of the season.
 
Time to get craftin'............

My Holiday Workout

 
Finally!  I can't believe that I have finally found glass cutting boards at the Dollar Tree!  And right now I'm in a bit of vinyl heaven.  I have been wanting to create decorated cutting boards for months but my local store has had the boards.  Well last weekend I asked my hubby to take me to the next town over so I could check out their stores and just as I was about to give up, there they were, kind of hidden on the back wall (instead of with the glass ware).  I picked up a dozen - 6 round and 6 square, but even that wasn't enough because I had my daughter pick up more for me yesterday.
 
I have several designs to play with but today I want to share this one I used from Apex Cuttable Designs.  This file is called Wine Holiday Workout and it comes with four different versions - two of which I am show casing today.  These were great files to work with.  They cut like butter and placement was easy as can be.
 
 
Creating these boards was easy too.  They're both 7 3/4" boards so I cut the designs around 6 inches so that I'd have plenty of room to clear the feet with my designs.  While the design was cutting I wiped the backside of the board down with alcohol to remove any dirt or residue that would cause the vinyl not to adhere and once dry I applied the vinyl.  And now I have great looking cutting boards.  Just remember that if you're working with glass or using this design for a shirt to mirror the image before cutting.  I have to admit that since this was my first cutting board I forgot to do that when I cut the round design the first time.
 
Now my only 'problem' is deciding what design/s to play with next.

Snowman Portrait

 
Happy Friday everyone!  Today I have a Christmas card that I'd like to share with you. 
 
This one features the Polaroid Pal Card Snowman from Treasure Box Designs.  Unfortunately it looks like this particular file has been retired as I could not find it when I tried to link back to it for you.  I purchased this file last year along with another one and now I'm thinking I'm glad that I did.....even though I haven't used it until now.


The stamped sentiment on the outside of my card is from the Winter Wonderland stamp set from My Craft Spot.  Sorry, they are no longer around either.  I also used another sentiment from this set on the inside of my card along with some of the snowflake stamps.

Spooky Greetings

Happy Wednesday everyone.  How about another Halloween card today?  This one features the fun, classic Ghostbuster design from Apex Cuttable Designs.
 
Initially when I saw this fun design I thought about making a nightlight with it.  But then I realized that doing so would prevent light from coming through since it's a layered design.   My second idea was to use this ghostbuster and the first "O" in the word Boo for a card but after a couple tries at cutting out the face I realized just how small a cut I was trying to do and my poor eyes couldn't hang.  So then I decided to use the ghostbuster as the main and only focal point for my greeting card.
 
This was a fun design to put together and I love how easy it was to do so.  Well, once I went for a size that wasn't too small for my eyes.  LOL  I think this would even be a fun one to use on a glass block or a t-shirt.  (If only my birthday would hurry and get here so I can get that heat press I'm itching for)
 
The sentiment on my card is from the Halloween Panels stamp set from Jaded Blossom.  I also used this set along with a sentiment from Pick Your Poison for the inside of my card.
 
To add a bit of "texture" to my card, I used some of the stream colored skittles from DoubleClick Connections.

Scaredy Cat

I don't know about you but my holiday weekend was full of crafting.  Guess it helps when you're not feeling well and don't want to do much of anything else.  Well that and at least one and a half days of nothing but rain.  Otherwise we'd be out running around town like no tomorrow.
 
I've been creating a lot of vinyl projects lately as you all know.  Just doing something different from always creating greeting cards.  But this weekend I made a couple of different cards and today I'm sharing one of the Halloween ones I created.
 
This one uses the recently released Scaredy Cat Shaped Card from Marjorie Ann Designs.  While I haven't created all of the shaped cards she's released I love every single one that I have created.    It's always fun to step outside of the traditional folded card and play with a new design.  And Marjorie Ann Designs has the best ones I've found.
 
The sentiment on my card is from the Frankly Frightful stamp set from Cardz TV Stamps.  Given the cat on this particular card this was of course the perfect sentiment. 

Savings Managed

 
I found a couple of these wonderful jars at my local Dollar Tree this past week and picked them up not really knowing what I was going to do with them.  After leaving them sitting on my rather messy desk/work area I finally had an idea...Why not turn them into some kind of 'bank'?
 
So off I went in search of bank ideas from which I could draw inspiration.  However, that ended quickly as nothing really appealed to me.  Then I remembered a similar project someone posted in one of my FB groups where she created a jar for saving coins for the laundry mat.  THAT was my inspiration for these jars.
 
 
Using files from two different Harry Potter FB groups that I belong to I set off making my 'bank'.  At first I tried layering the Gringotts logo onto a white background, but since it kept bubbling up on me I decided to dispense with that idea.  The verbiage I just typed out and cut in Studio.
 
Now I have a fun bank in which to store my muggle monies.  My Gringotts currency is currently set up in it's own little display case.


Unicorn Night Lights

Happy Sunday everyone.  I was recently approached by Dee over at Apex Cuttable Designs about a wonderful opportunity to partner together.  It would allow me to create projects using their designs and in return I will provide my fellow crafters - that's you - with an honest review.
 
For my first project I wanted to work with the Unicorn Cuttable Design file.  I had searched through the Silhouette store looking for unicorn files that I could use for my night lights and jar lights.  But none of the designs I saw appealed to me.  However, while looking through the designs at Apex this file said "yes, use me!" and so that's what I did.
 
Now if you haven't seen my other night lights like this (and I can't imagine that you haven't - unless of course you're new to my blog and in that case, welcome!) here's the low down on how I created these two night lights......
 
The night lights are from Dollar Tree.  They call them fashion night lights because initially the round cover has a printed graphic.  But with a minimal amount of swirling the cover around in some acetone nail polish and light rubbing with a paper towel, the graphic is easily removed.  After removing the graphic I wash my covers with dish soap and allow to dry.
 
While the covers dry I find the design I want and cut from vinyl.  (I use the permanent Oracal 651)  For these particular lights I used two different unicorns from the Unicorn Cuttable Design.  On one of the lights I also added a quote using a font called AR Cena.
 
Using two of the different unicorns in this file I found that I liked using the SVG format best.    The file included a version for Silhouette studio but the paths weren't all grouped/compounded so when I tried to scale for the size I needed I had difficulty - until I grouped/compounded.  But instead of going through all that I found that I could open the SVG file and just go for it.  The files both cut beautifully and the weeding was very easy to do as well.  And as you can see, the final result is just beautiful.  Whether lit or not the elegance of each design shows through.
 
As for me, I'm ecstatic to have found a unicorn file that I love and I will definitely be using some of the other designs included in this file (there are six unicorns included).
 
And now that you've seen my project, you really need to head on over to Apex Cuttable Designs and check them out.  They've got a lot of great designs ready for the picking.  Especially if you're like me and love to work with vinyl.  Their designs are perfect for use with the vinyl medium.  Who knows maybe, just maybe, I'll get that heat press I keep telling my hubby I want and soon enough I can start using some of these gems for shirts and things.
 
Until then though I'll keep crafting with other projects.

Elf Watching

So how about we fast forward to Christmas again and I share a fun Christmas light I created yesterday?  I had originally planned to take the day off from work yesterday to catch up on some things and as it turned out I'm home sick.  Then we thought we were going to be in the path of Hurricane Hermine but the storm started taking more of an easterly path and so we were spared.  But even with all that going on I was determined to get something created.
 
To create this light I used one of my favorite 'apothecary, style glass jars from Hobby Lobby.  These lights are so fun to create and the possibilities are absolutely limitless.  I've probably created over a couple dozen of these already in preparation for my first craft show of the season later this month.
 
Creating these lights is super easy.  You just wipe the glass down with rubbing alcohol and allow it to dry. Then you apply your vinyl design.  (I like to use permanent Oracal 651 which I purchase from Vinyl Spectrum.  They've always provided great customer service and are quick to ship.)  After that you spray with a frosted glass spray.  (I've used both Valspar and Rust-o-leum brands with great results.)
 
The design that I used for this light is titled Christmas Cutting File and it's from the Hungry JPEG. 
 
With that, I am off to enter my project into the following challenges:

Die Cuttin' Divas - Anything Goes - Ends Sunday, September 4th

Hiding in My Craft Room - Any Holiday - Ends Saturday, September 3rd

Justice League Light

Today I have another glass block light that I'd like to share with you.  This one was made using a file from one of my Facebook groups. 
 
My oldest son is a huge DC and Marvel Comics fan so when I saw this file I knew it was one I had to try.  I'm glad I did too because I love the way that the block turned out.  My only wish for something different is that I could have found a comic print fabric that had these superheroes.  I guess that's okay though because this fabric works well too.